
Process#
1. Organization of the group (6/11)#
Each member of our group will be assigned a role such as an animator, the time manager, the secretary and the one responsible for the atmosphere of the group. We will try to change these roles regularly.
Structure of a meeting:
- Entry Weather (how is everyone going and feeling ?)
- Subject - To/do
- Planification
- Calendar
- Exit weather
We gave roles to everybody in the group:
- Secretary: Alishba
- Time management: Louis
- Animator: Sif eddine
- Atmosphere: Moïra
We decided that at every meeting we would change roles.
We’re gonna use Trello to assign every task. Additionally, it has been decided that English will be the language used for our documentation to facilitate communication with all group members. Our scheduled meeting time is on Wednesdays at 8:00 PM.
The name of our group is gonna be ReFABric.
Problem Tree and Solution Tree#

2. Find our problematic (7/11)#
We started with “How can we sensibilize to waste ?”. We found this idea because when we throw our waste away, it just disappears like magic. This aspect of waste seemed interesting to us.
We have to respect the theme “Make the invisible visible”, so we’re gonna try to make visible the waste. We thought about reparation and to make it more accessible.
It was too wide for a problematic, so we added constraints.
-
It must be waste at home
-
Easily reparable
-
Object that often breaks
First, we thought about glass. It breaks easily (cups and plates), it breaks often but it’s not easy to repair them.
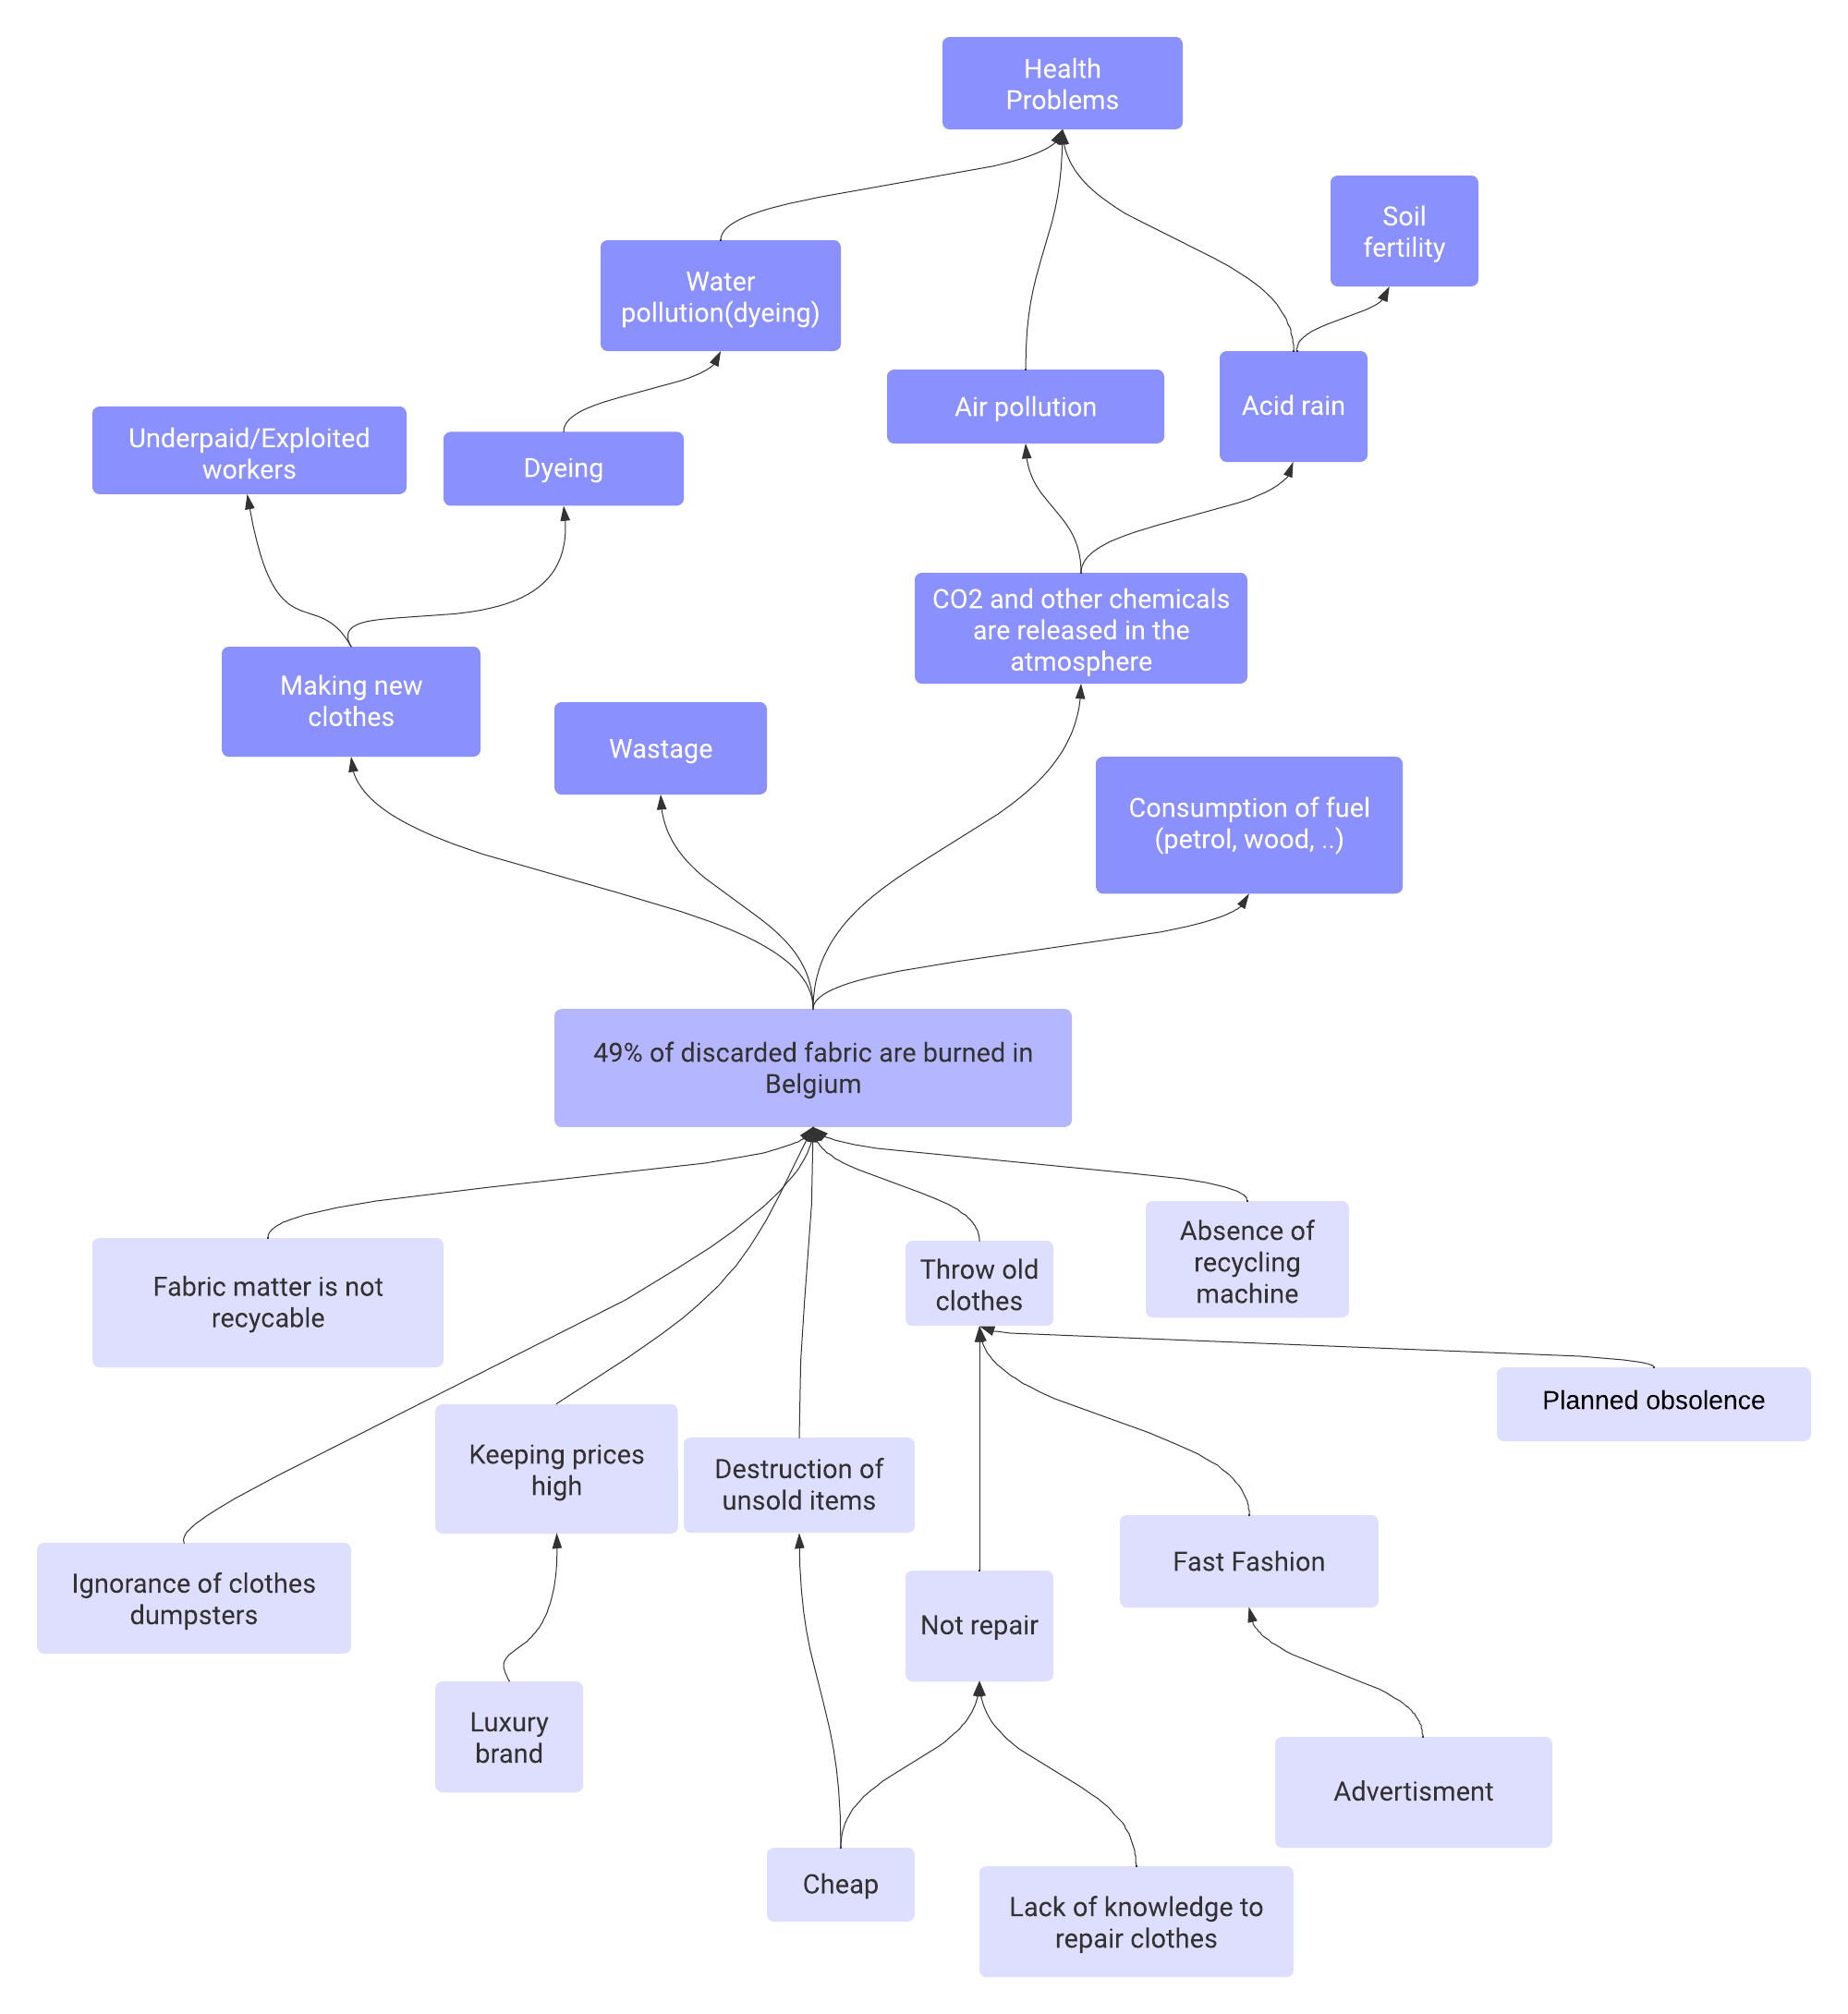
After we thought about clothes. We made an ascertainment: we give the clothes in good shape but we all noticed that we throw our damaged clothes in the normal bin. In Belgium, we throw 10kg of clothes a year: 6kg is processed, 4kg is burned. Of the 6kg processed: 5% finished in second hands shops, 50% is exported, 28% is recycled (in rags for example) and 17% ends up burned anyway.
In conclusion, today in Belgium, 49% of the clothes are burned each year. This is the problematic that we want to try and solve here.
3. Time to find the Solution (13/11)#
This week we had to bring cardboard, thread, glue, etc., to make a first mock-up of our solution.
Solutions brainstorming#
Our first idea of a solution is to create a shredding machine so that we can reuse the fabric to fill our cushions and stuffed animals.
The other weird solution was a machine to compress clothes to create furniture.
Constraints#
The machine must be small, fast and accessible to everyone.
Mentors#
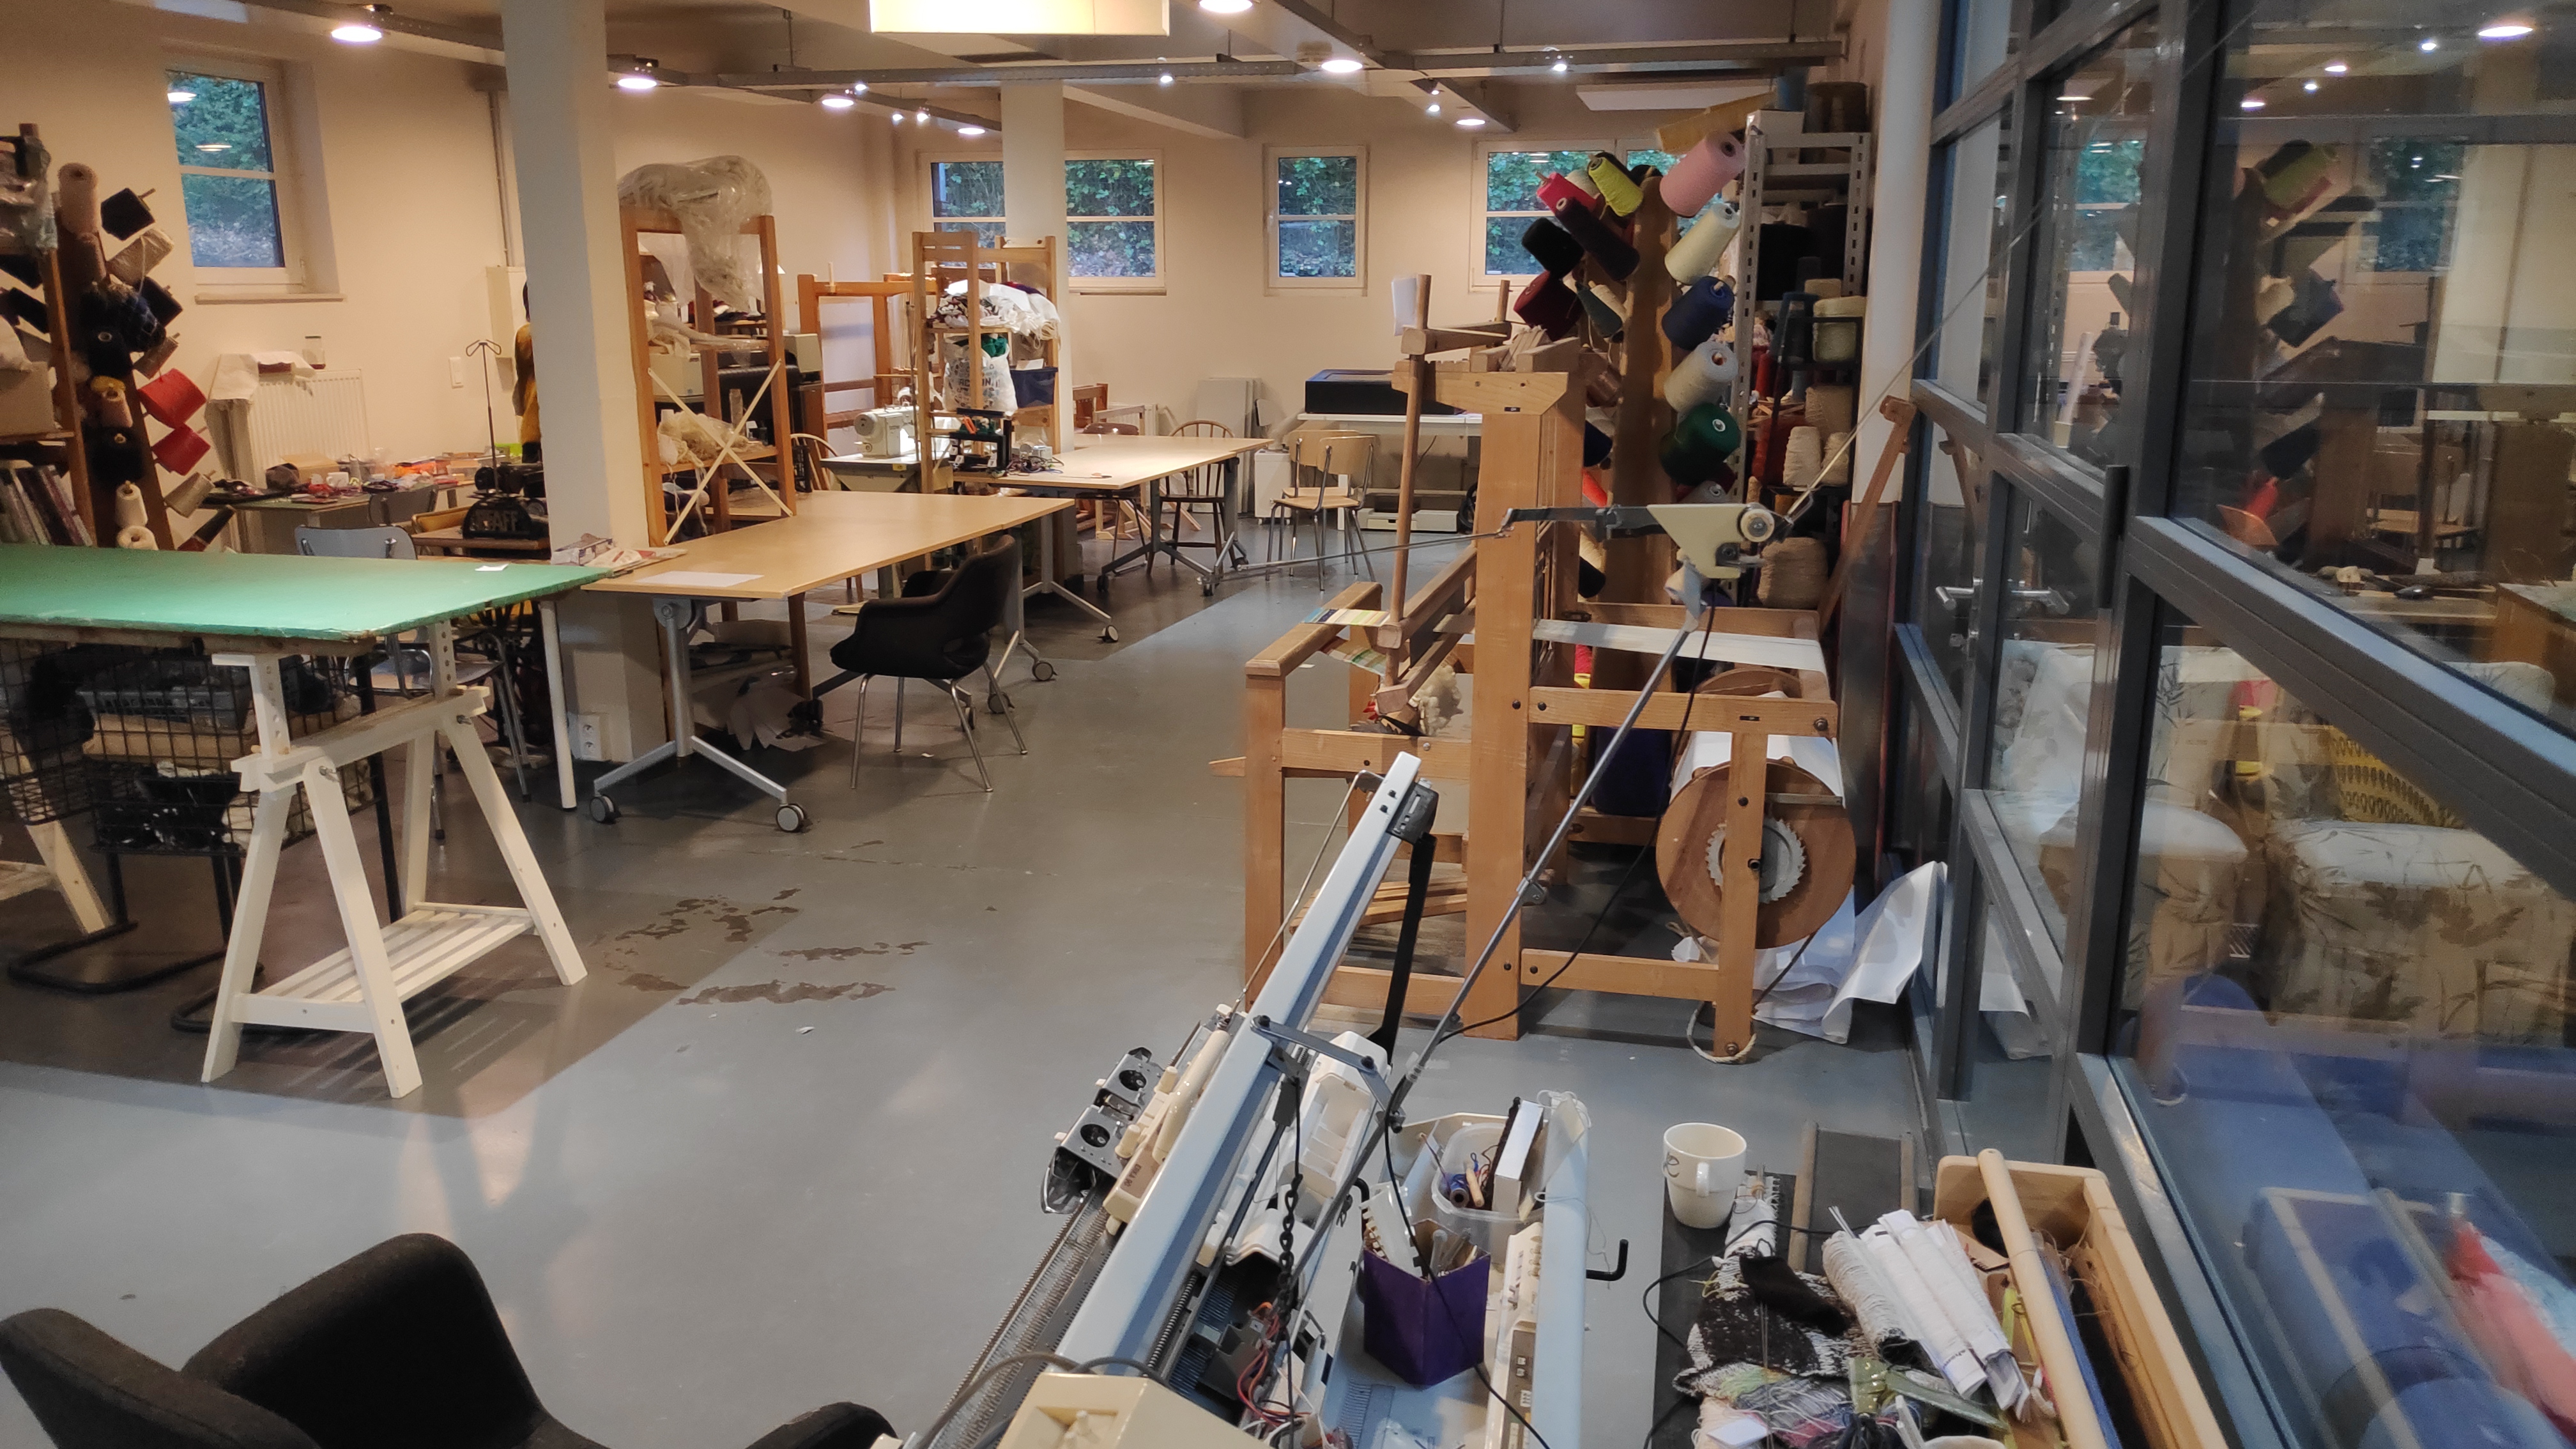
Our teacher Mr. Terwagne told us about a mentor: Valentine from GreenFabric. That’s why we made an appointment with her to discuss our project and get her opinion. The GreenFabric is a collaborative workshop focused on creative endeavors, providing a space where various collaborators can come together and work collectively.
He also told us that two members of GreenFabric (Christine and Nathalie) were at the Fablab so we also had the chance to talk with them. They told us that by 2030, it will no longer be possible to re-export textile waste anywhere in the world (legally speaking). They were also very enthusiastic about our idea, but told us that it was important to know what kind of fabric we wanted to shred. They also recommended a film for us to watch: Welcome to Sodom.
Models#
| Overall plan | Our solution | Our weird solution |
|---|---|---|
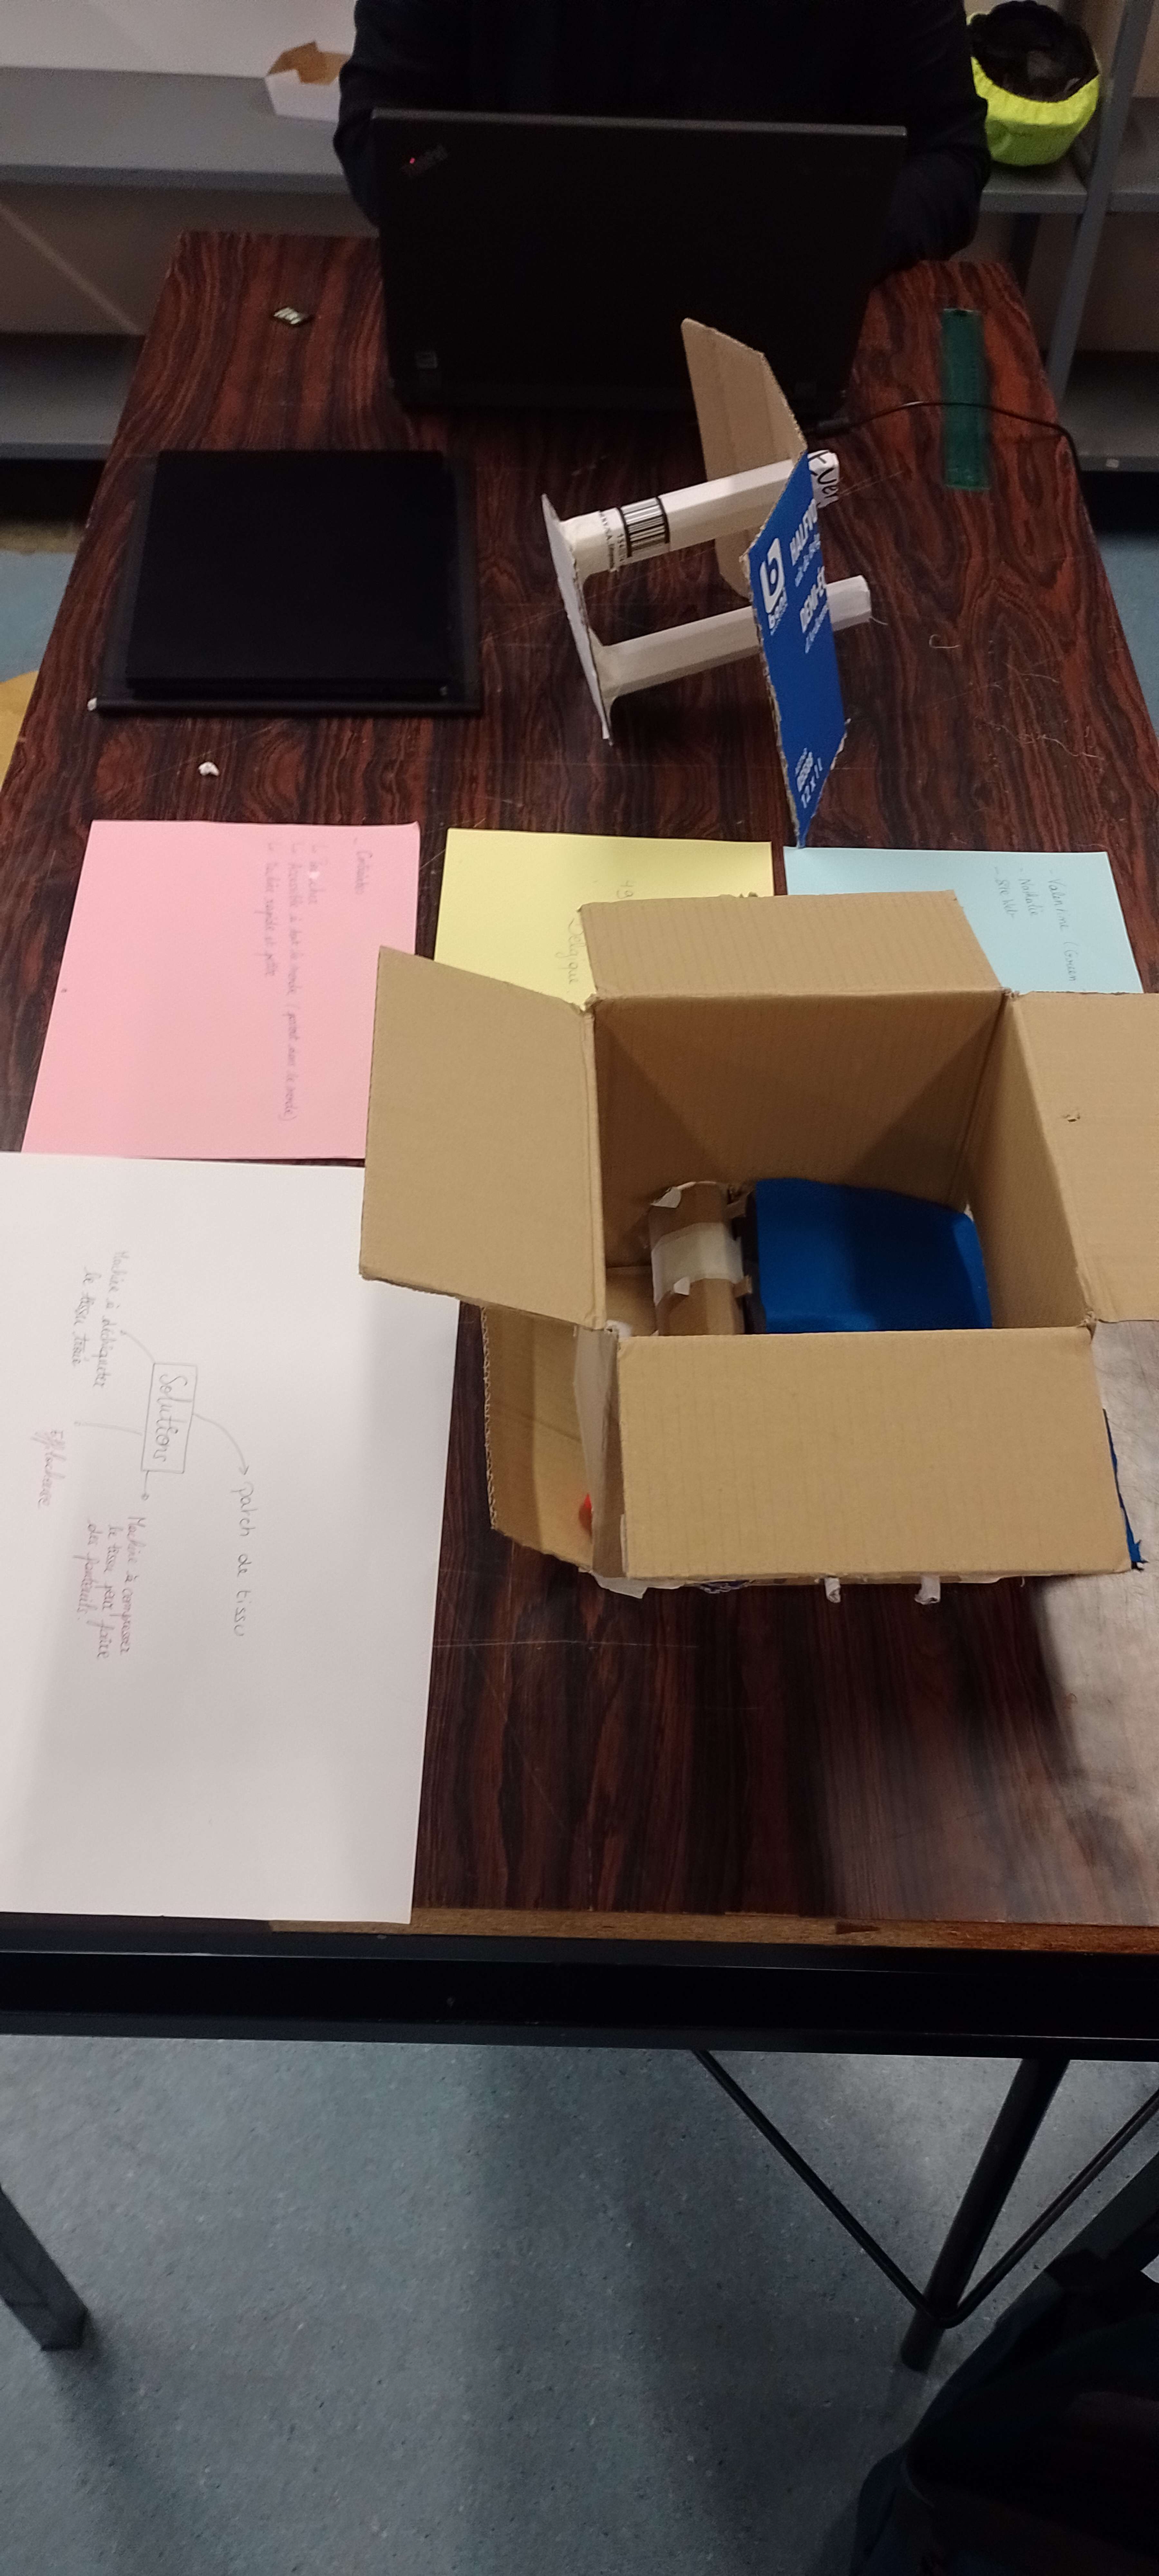 |
 |
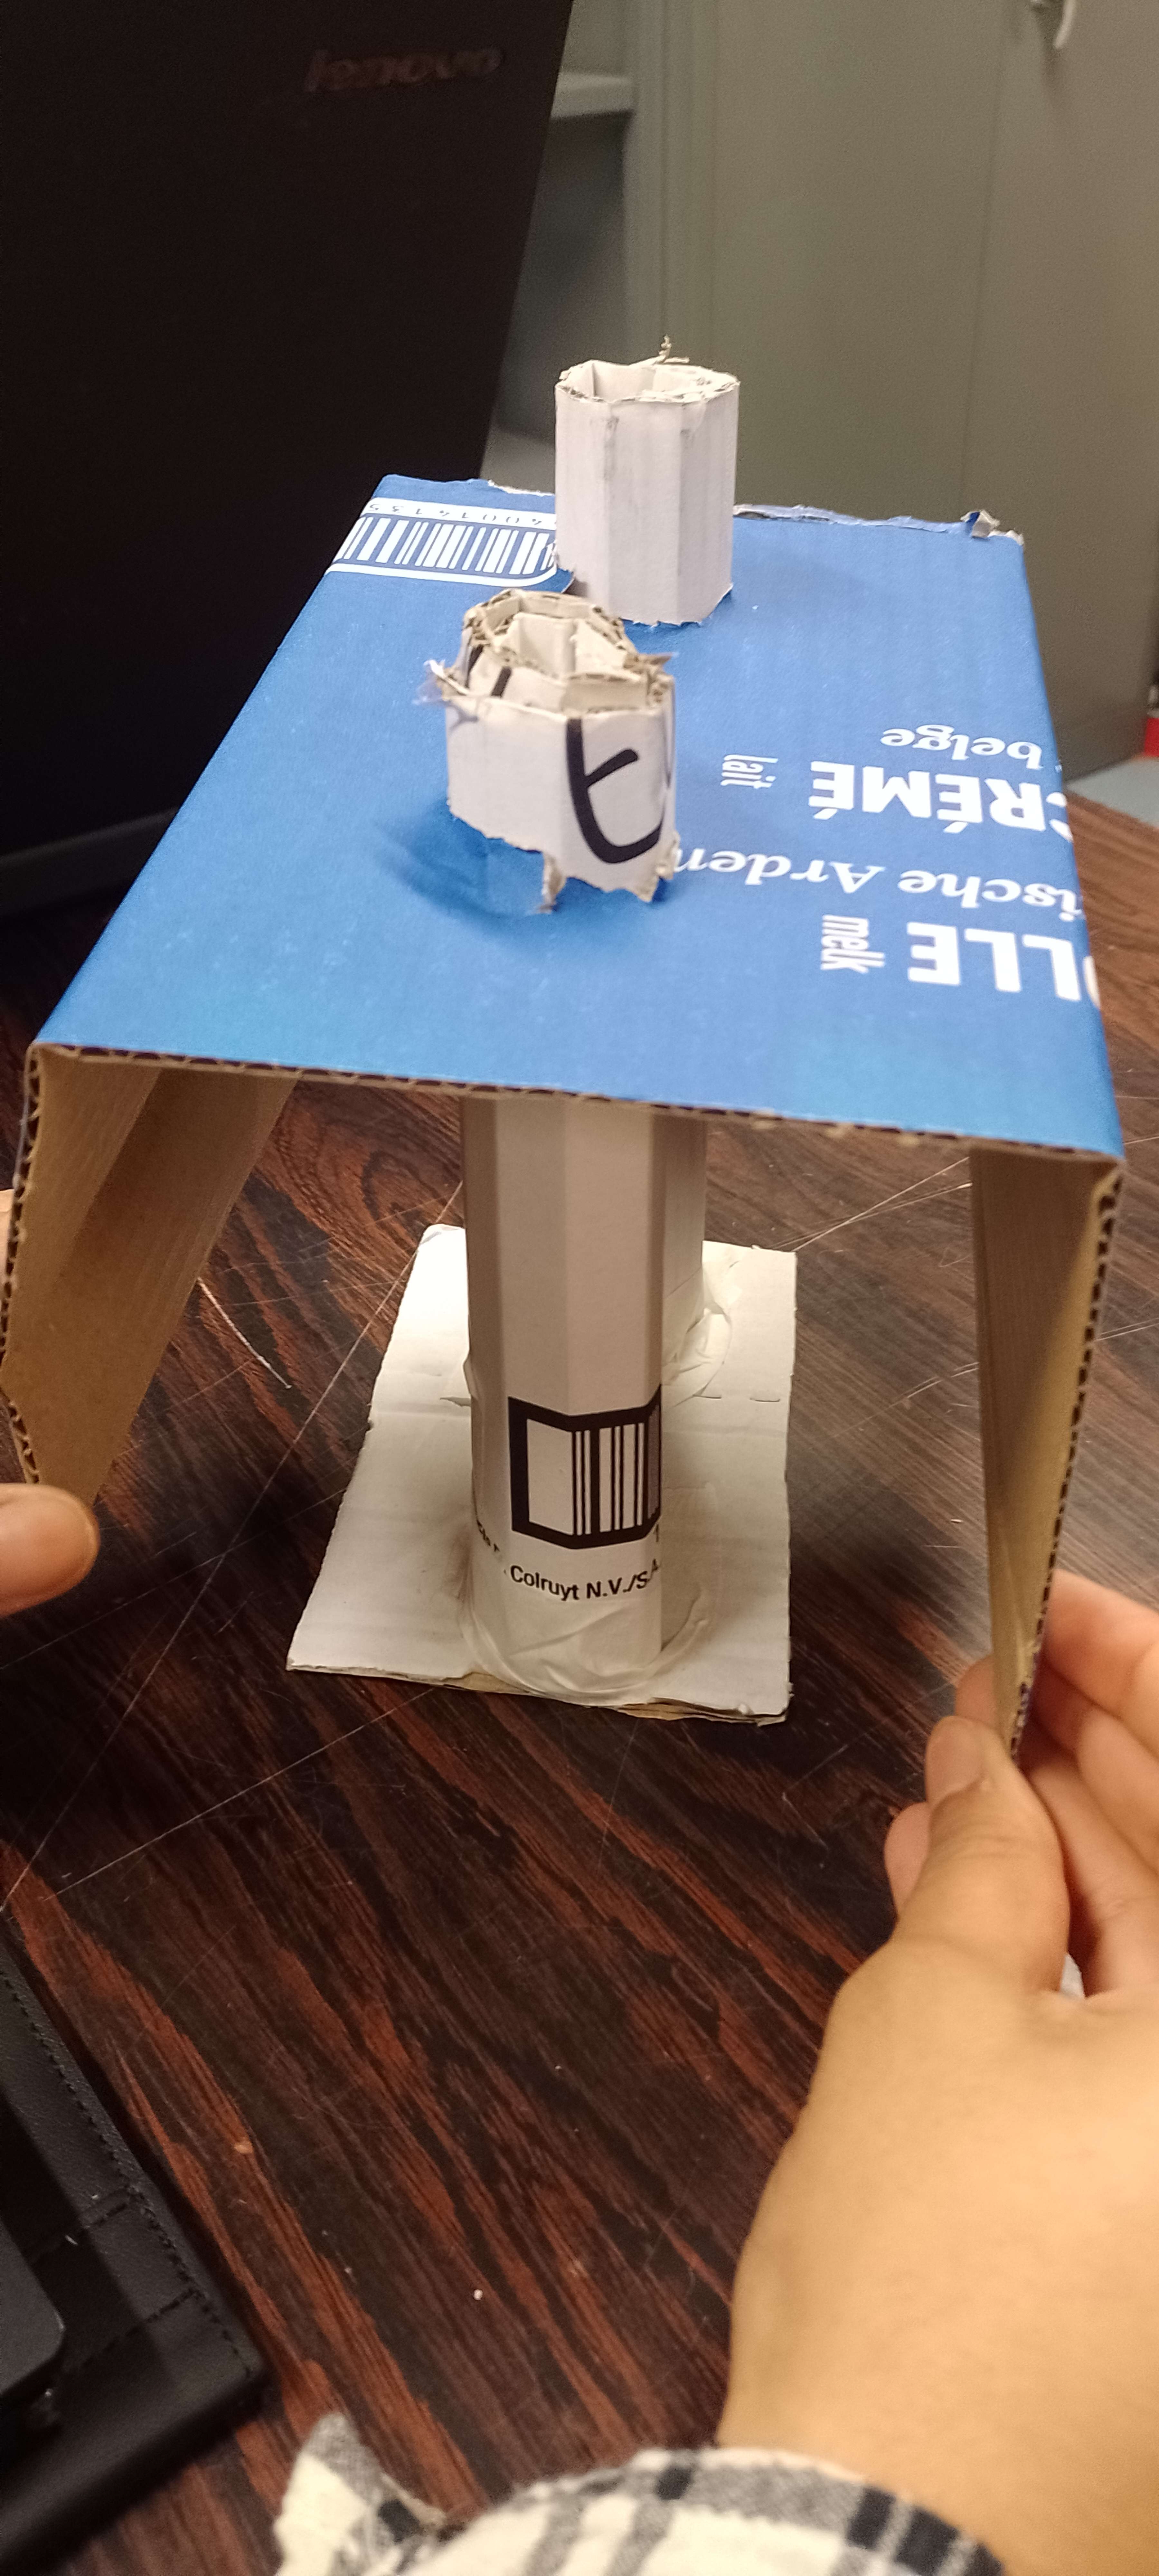 |
4. Contact with Valentine and Visit of GreenFabric (14/11)#
This morning we met Valentine and discovered the GreenFabric. She gave us a tour of the GreenFabric and was very kind.

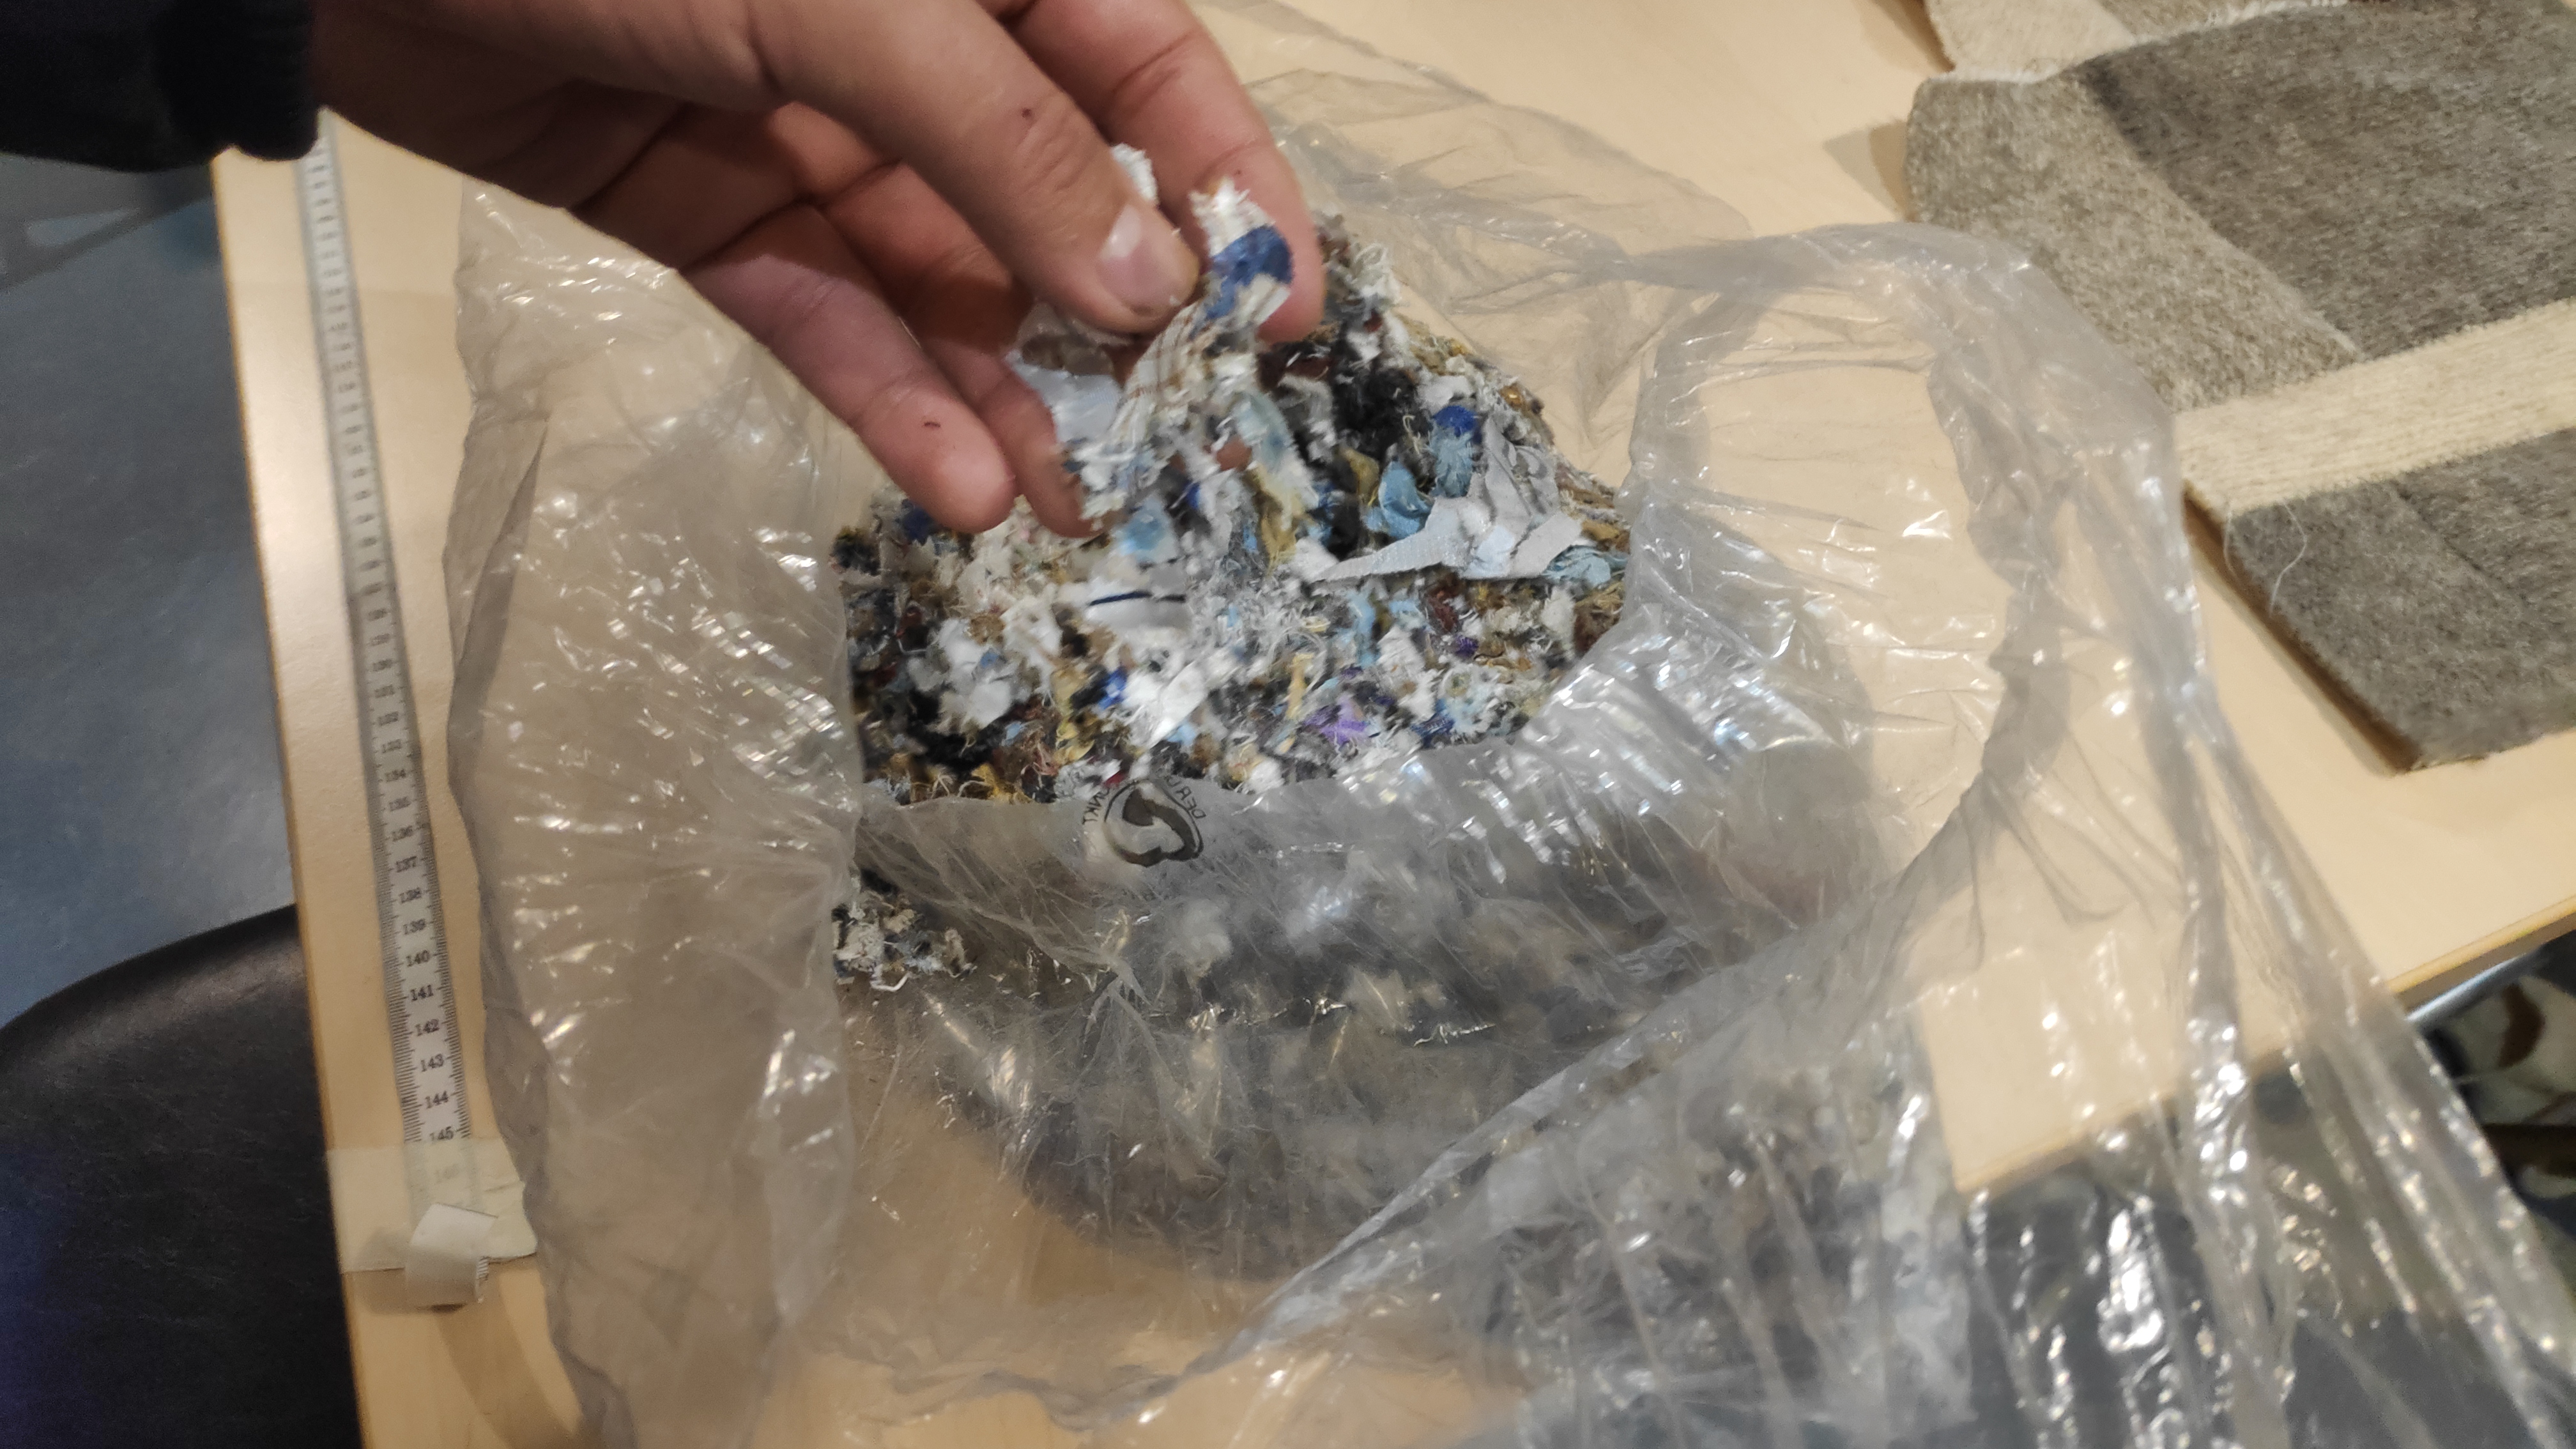
We explained to her our idea of making a shredding machine and she told us that it was not very interesting for two simple reasons. First, it already exists and it is very hard to use. Secondly, having previously tested for herself, fabric flakes are not that interesting, because complicated to use. Indeed, stuffing cushions or animals with fabric flakes gives a bad result: nobody wants to buy it because it’s expensive and it isn’t very comfortable. Flakes look like this:
However, she explained to us that she needed one thing : a fraying machine. Today, all of them are extremely big and expensive (70.000 euros in second-hand) and aren’t open-source. So, we thought it would be a good idea to try and make a cheap, open-source and fast frayer machine.
We searched for some models on Internet, which was not an easy task. Frayer machines are rare and very big. So we took the problem in another way and searched how we fray textile manually and the idea to construct a roller with spikes came to us.
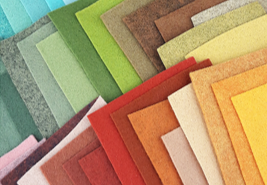
This is the expected result of the frayer machine:
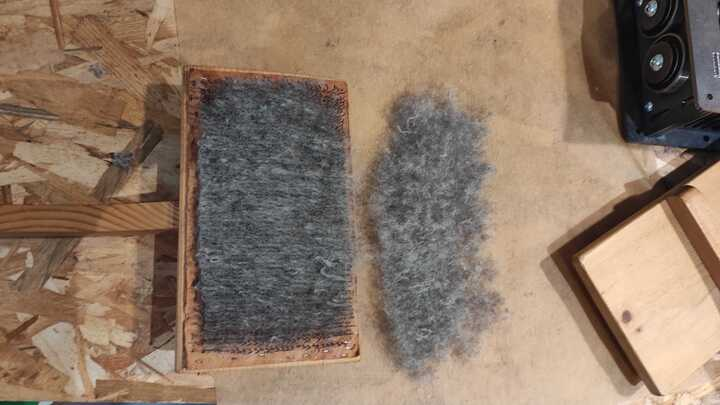
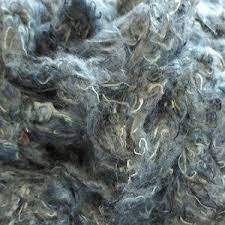
With this result there are able to make felt.
Felt is a fabric made by matting and pressing fibers together. It can be crafted from natural materials like wool or synthetic fibers. The process involves heat and pressure to create a soft and fuzzy material.
Felt is used in various applications, including:
- Crafts: People often use felt in crafting to create, for instance, stuffed animals because it’s easy to cut and sew
- Clothing: It’s used in hats, slippers, and other items for its warmth and softness.
5. First tests (21/11)#
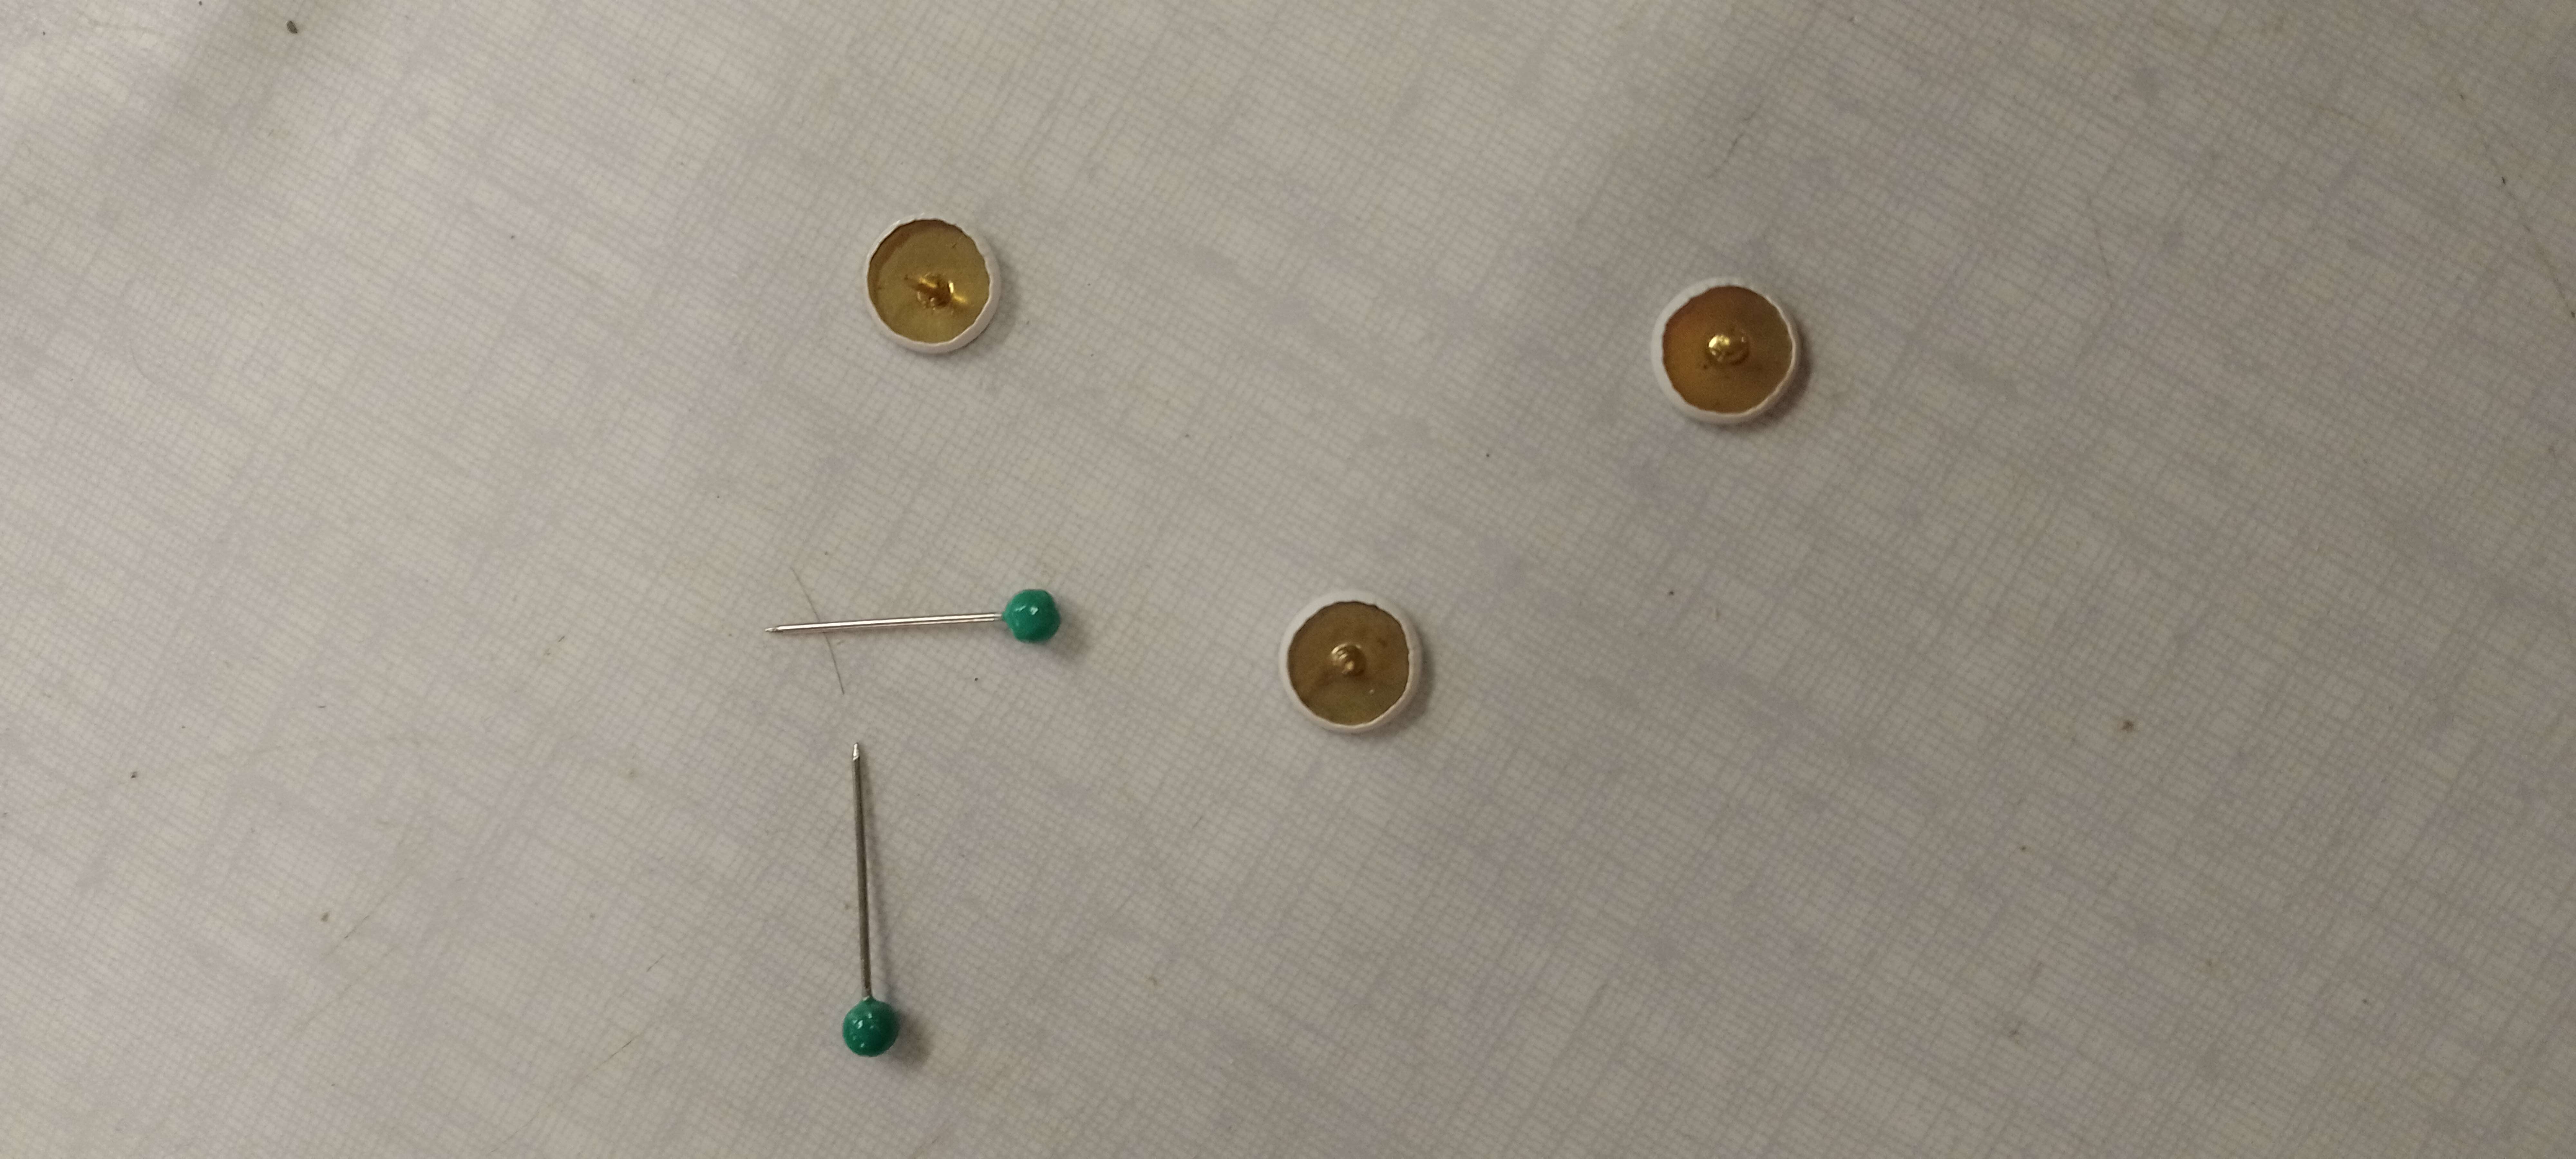
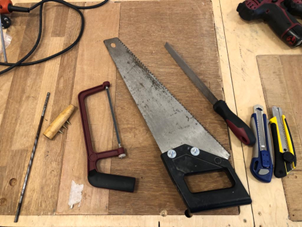
We have started prototyping our solution. So for this meeting, everyone had to bring sharp objects and a cylinder. The purpose of the meeting is to create a tool that can tear the fabric.
After all these tests, we noticed that we had to start at the edge of the fabric and not in the middle. We also learned that there are different types of weaving: jersey, mesh, etc.
Here are a series of things we tried:
None of these prototypes really worked. We found that scissors and cutters were the most effective. So, we have to find a way to use them efficiently in our design.
During our meeting with Mr Terwagne, he told us to pay attention to the fabric and how it’s made. We also contacted Valentine again for more information.
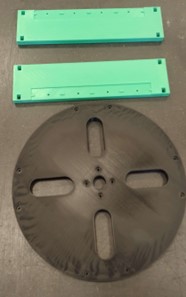
6. First prototype: 3D printing (27/11)#
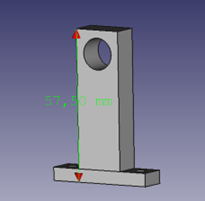
We designed all of our objects on Freecad. It’s an open-source application that allows us to create 3D models using parameters. We had to use the fablab tools to make our project so we decided to print our object with the 3D printer. The prototype was inspired by this site that we found during our research.
Design#
Result#
We also need a motor for our project, that’s why we went to the basement of our university at the Plaine campus to find one. There was a lot of dust, we searched a lot and finally found a really big motor which was really heavy.
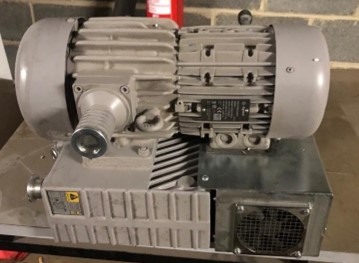

But finally, we decided that we are going to buy the motor because it will be a bit difficult to find one that matches our project requirements.
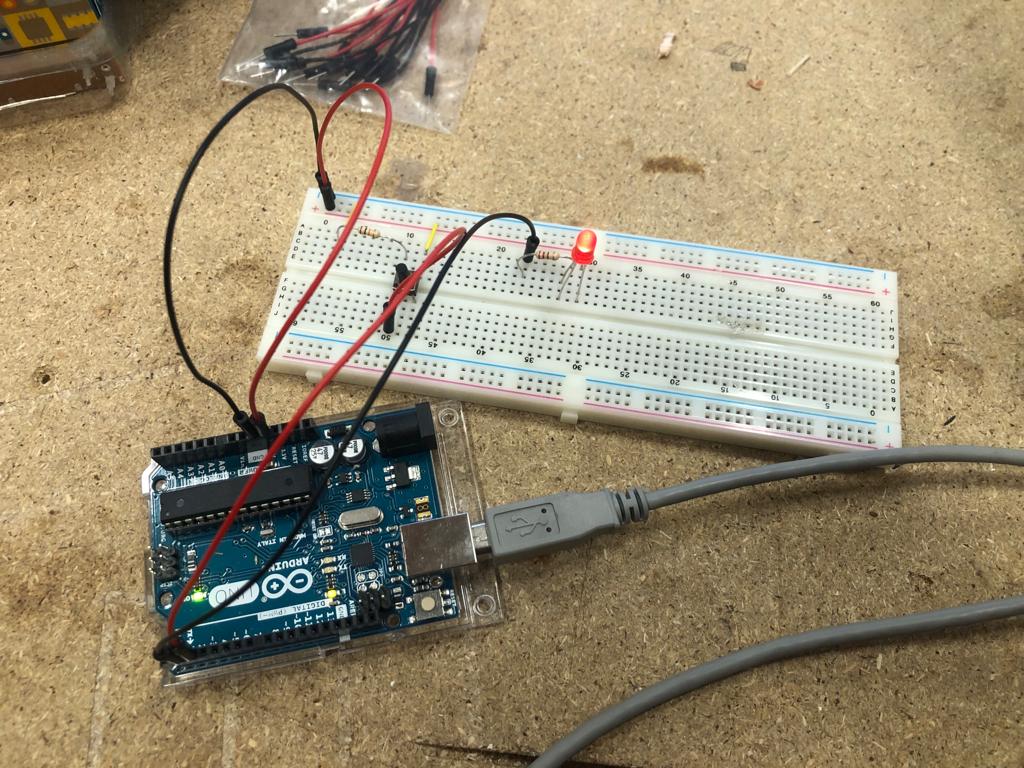
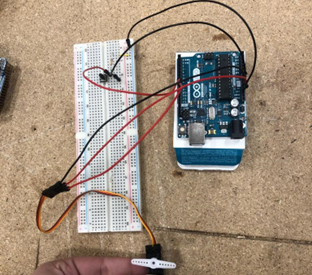
7. Arduino setup (8/12)#
What is an Arduino ?#
Arduino is an open-source electronics platform featuring user-friendly hardware and software. Its board interprets various inputs, like sensor-detected light, a button-pressed finger, a motor activation, LED illumination.
We need an Arduino to turn on and off the motor and also a button that will have the same role. Luckily, Louis had 2 Arduinos at home.
| Button on | Button off |
|---|---|
 |
 |
The code is available here.
For the motor :
The code is available here.
8. Test of our first prototype (9/12)#
We had a little problem assembling all the pieces together. Indeed some holes were too small. So we had to reprint some of the objects with the correct dimensions.
9. Reunion with the professor (11/12)#
After a few weeks, we had another meeting with Mr. Terwagne to check the project progression. Our prototype was not entirely ready, but the rotor was made and had some blades on it. It’s casing and the rest of the blades were still missing.
Upon presentation, we got feedback that we had not used the proper FabLab tools. Indeed, printing all those parts was time and material-costly. We should rather have used the laser cutter or the CNC, to design the parts in wood. The method we used cost us much time and we still had not been able to test it. This was not ideal, because we would probably come across new issues and difficulties, but too late to be able to do anything about it.
Outcomes of the reunion#
As we got out of the reunion our morale was a bit low. We then brainstormed about what we were going to do and decided to take on other approaches of the subject. This led us to come back to a method we had previously seen, early on. This consists of using the kind of brushes people use to comb dogs but on fabric, and this “frays” the fabric. You can see it here.
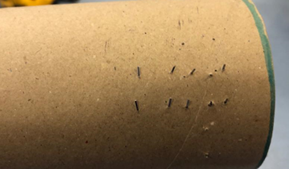
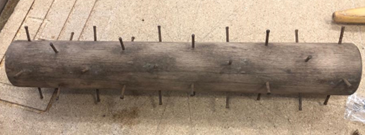
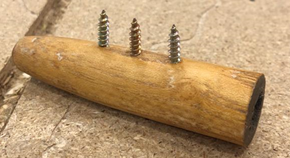
To try and reproduce that kind of brush, we tried to stick many nails into a wooden plank. We tried different densities (on the plank), lengths and diameters of nails and then tried to brush the fabric with those. The results were not exactly promising, we mostly obtained holes in the fabric but did not obtain what we were looking for as shown before.
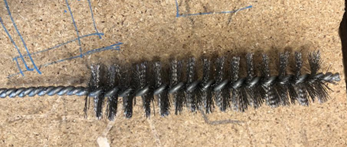
We then bought metallic brushes (usually used to remove rust and grime) :
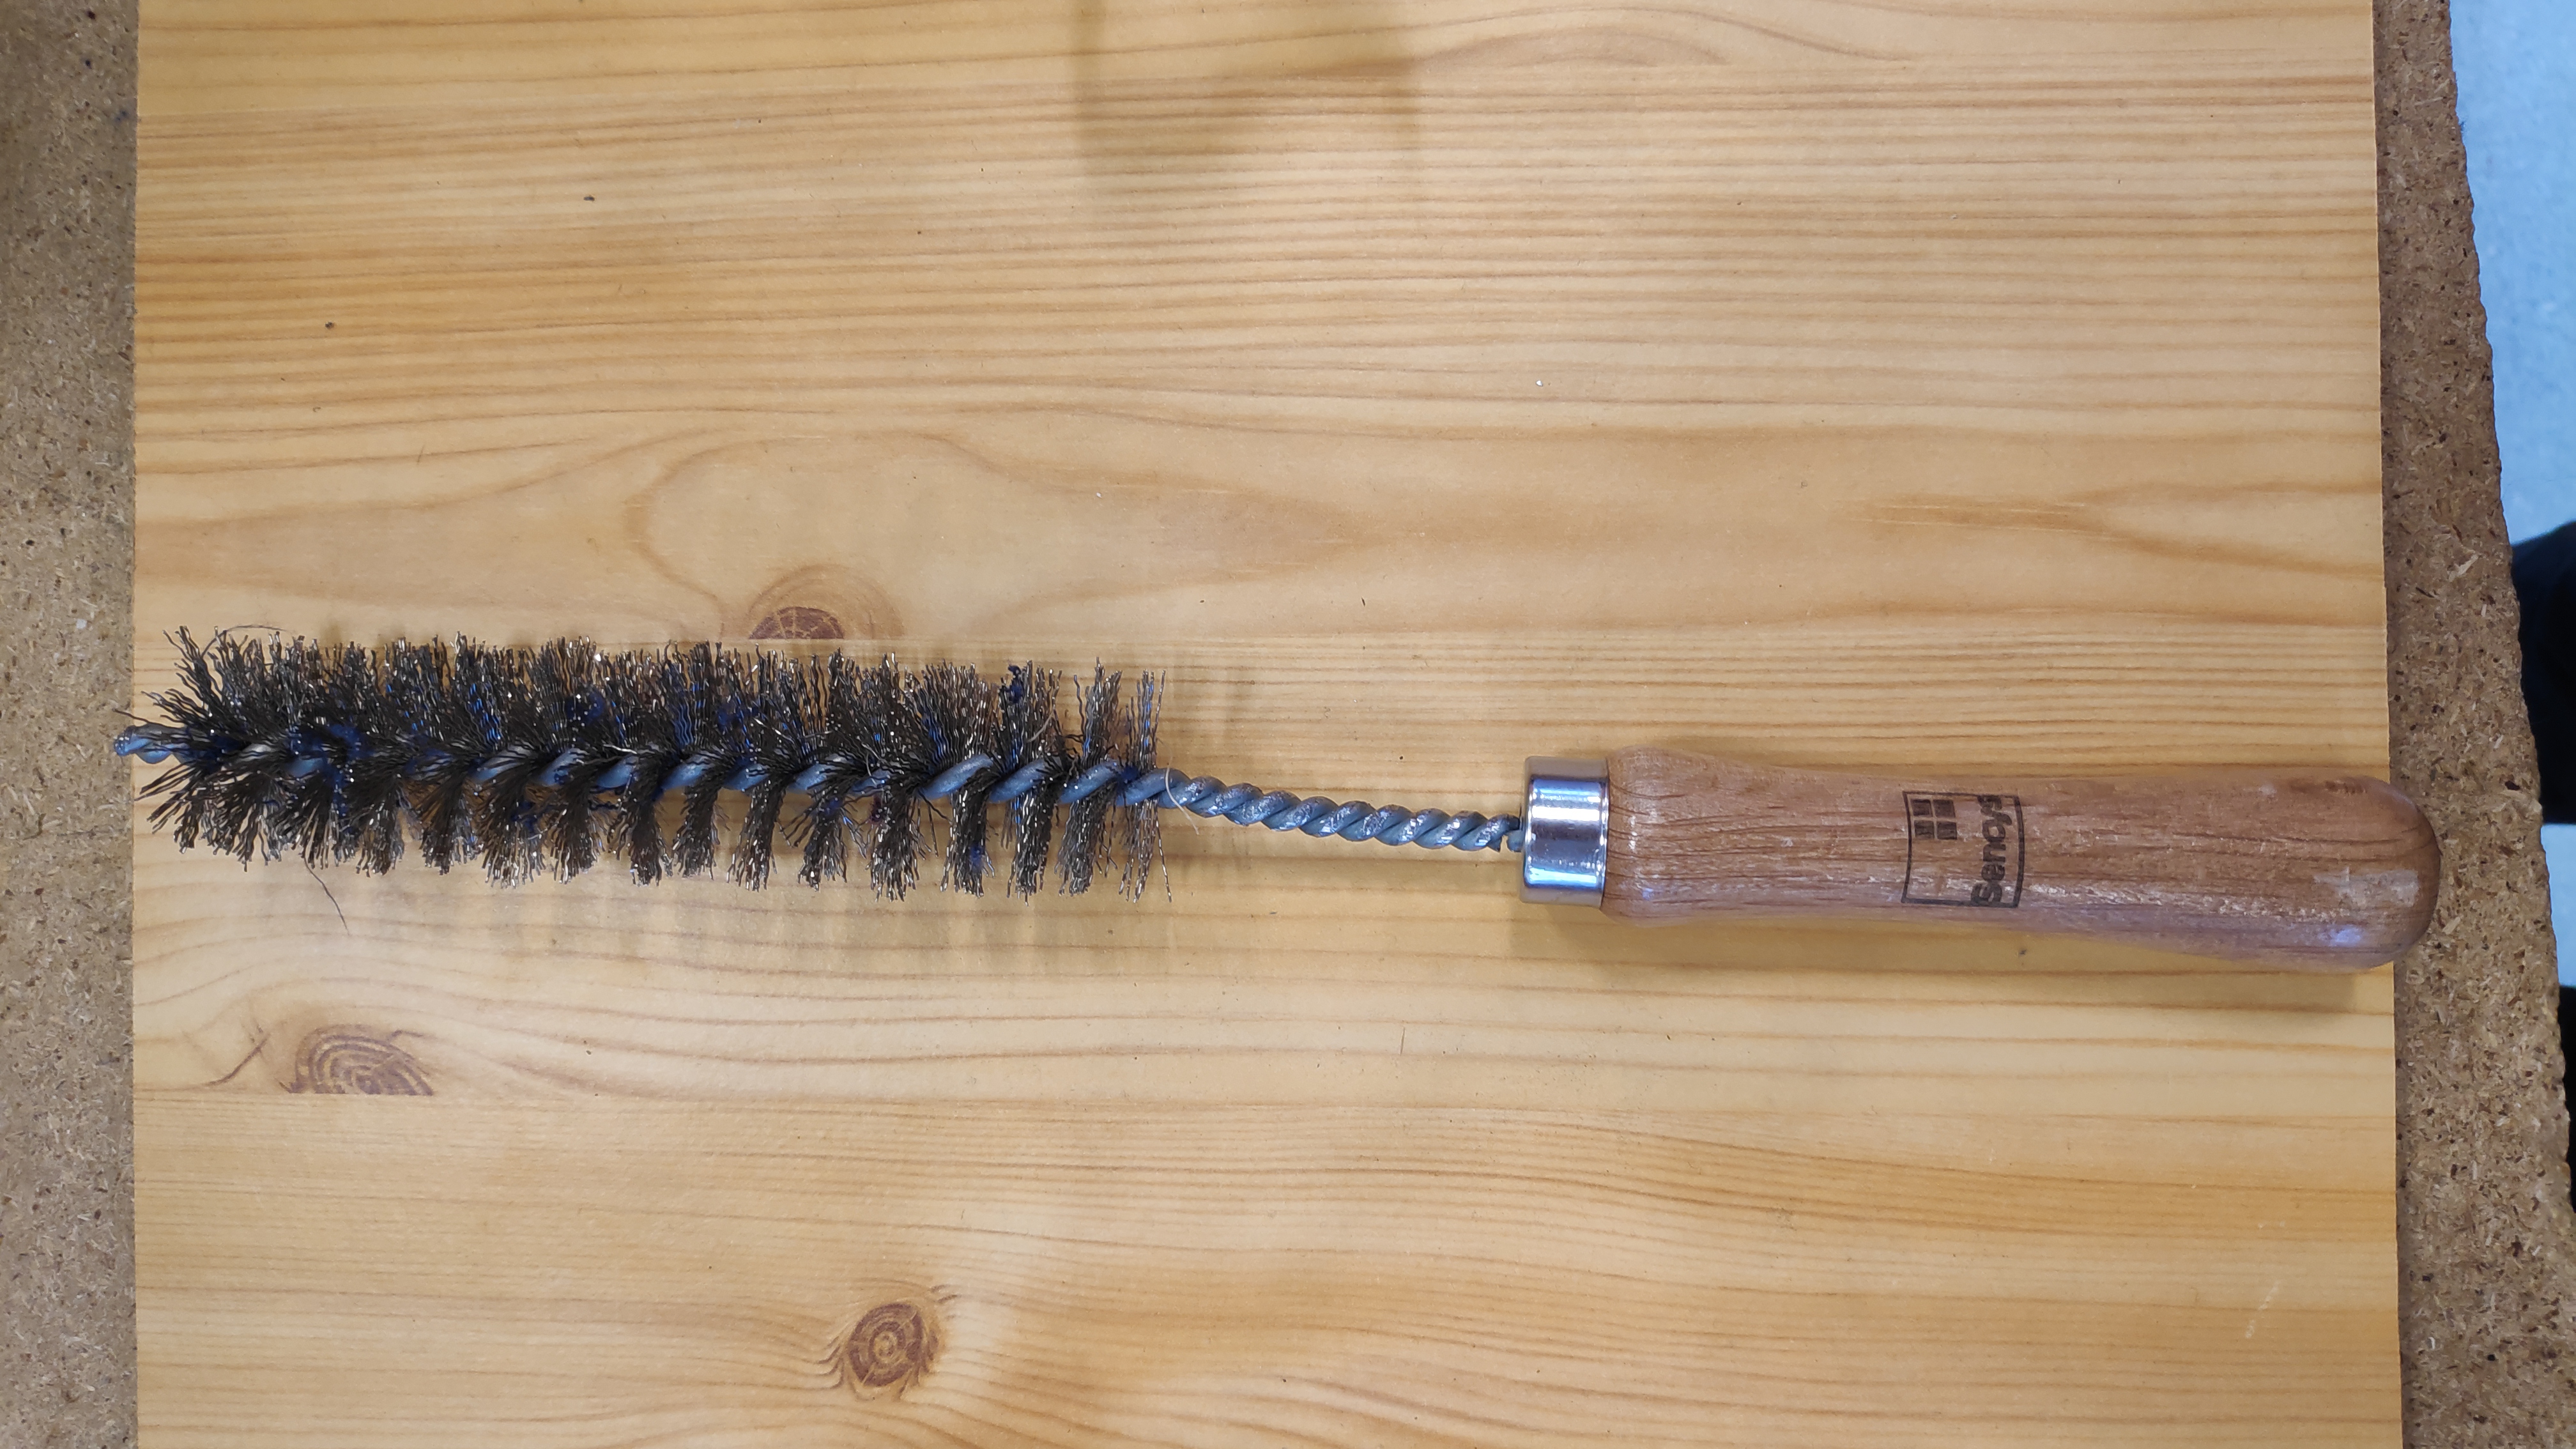
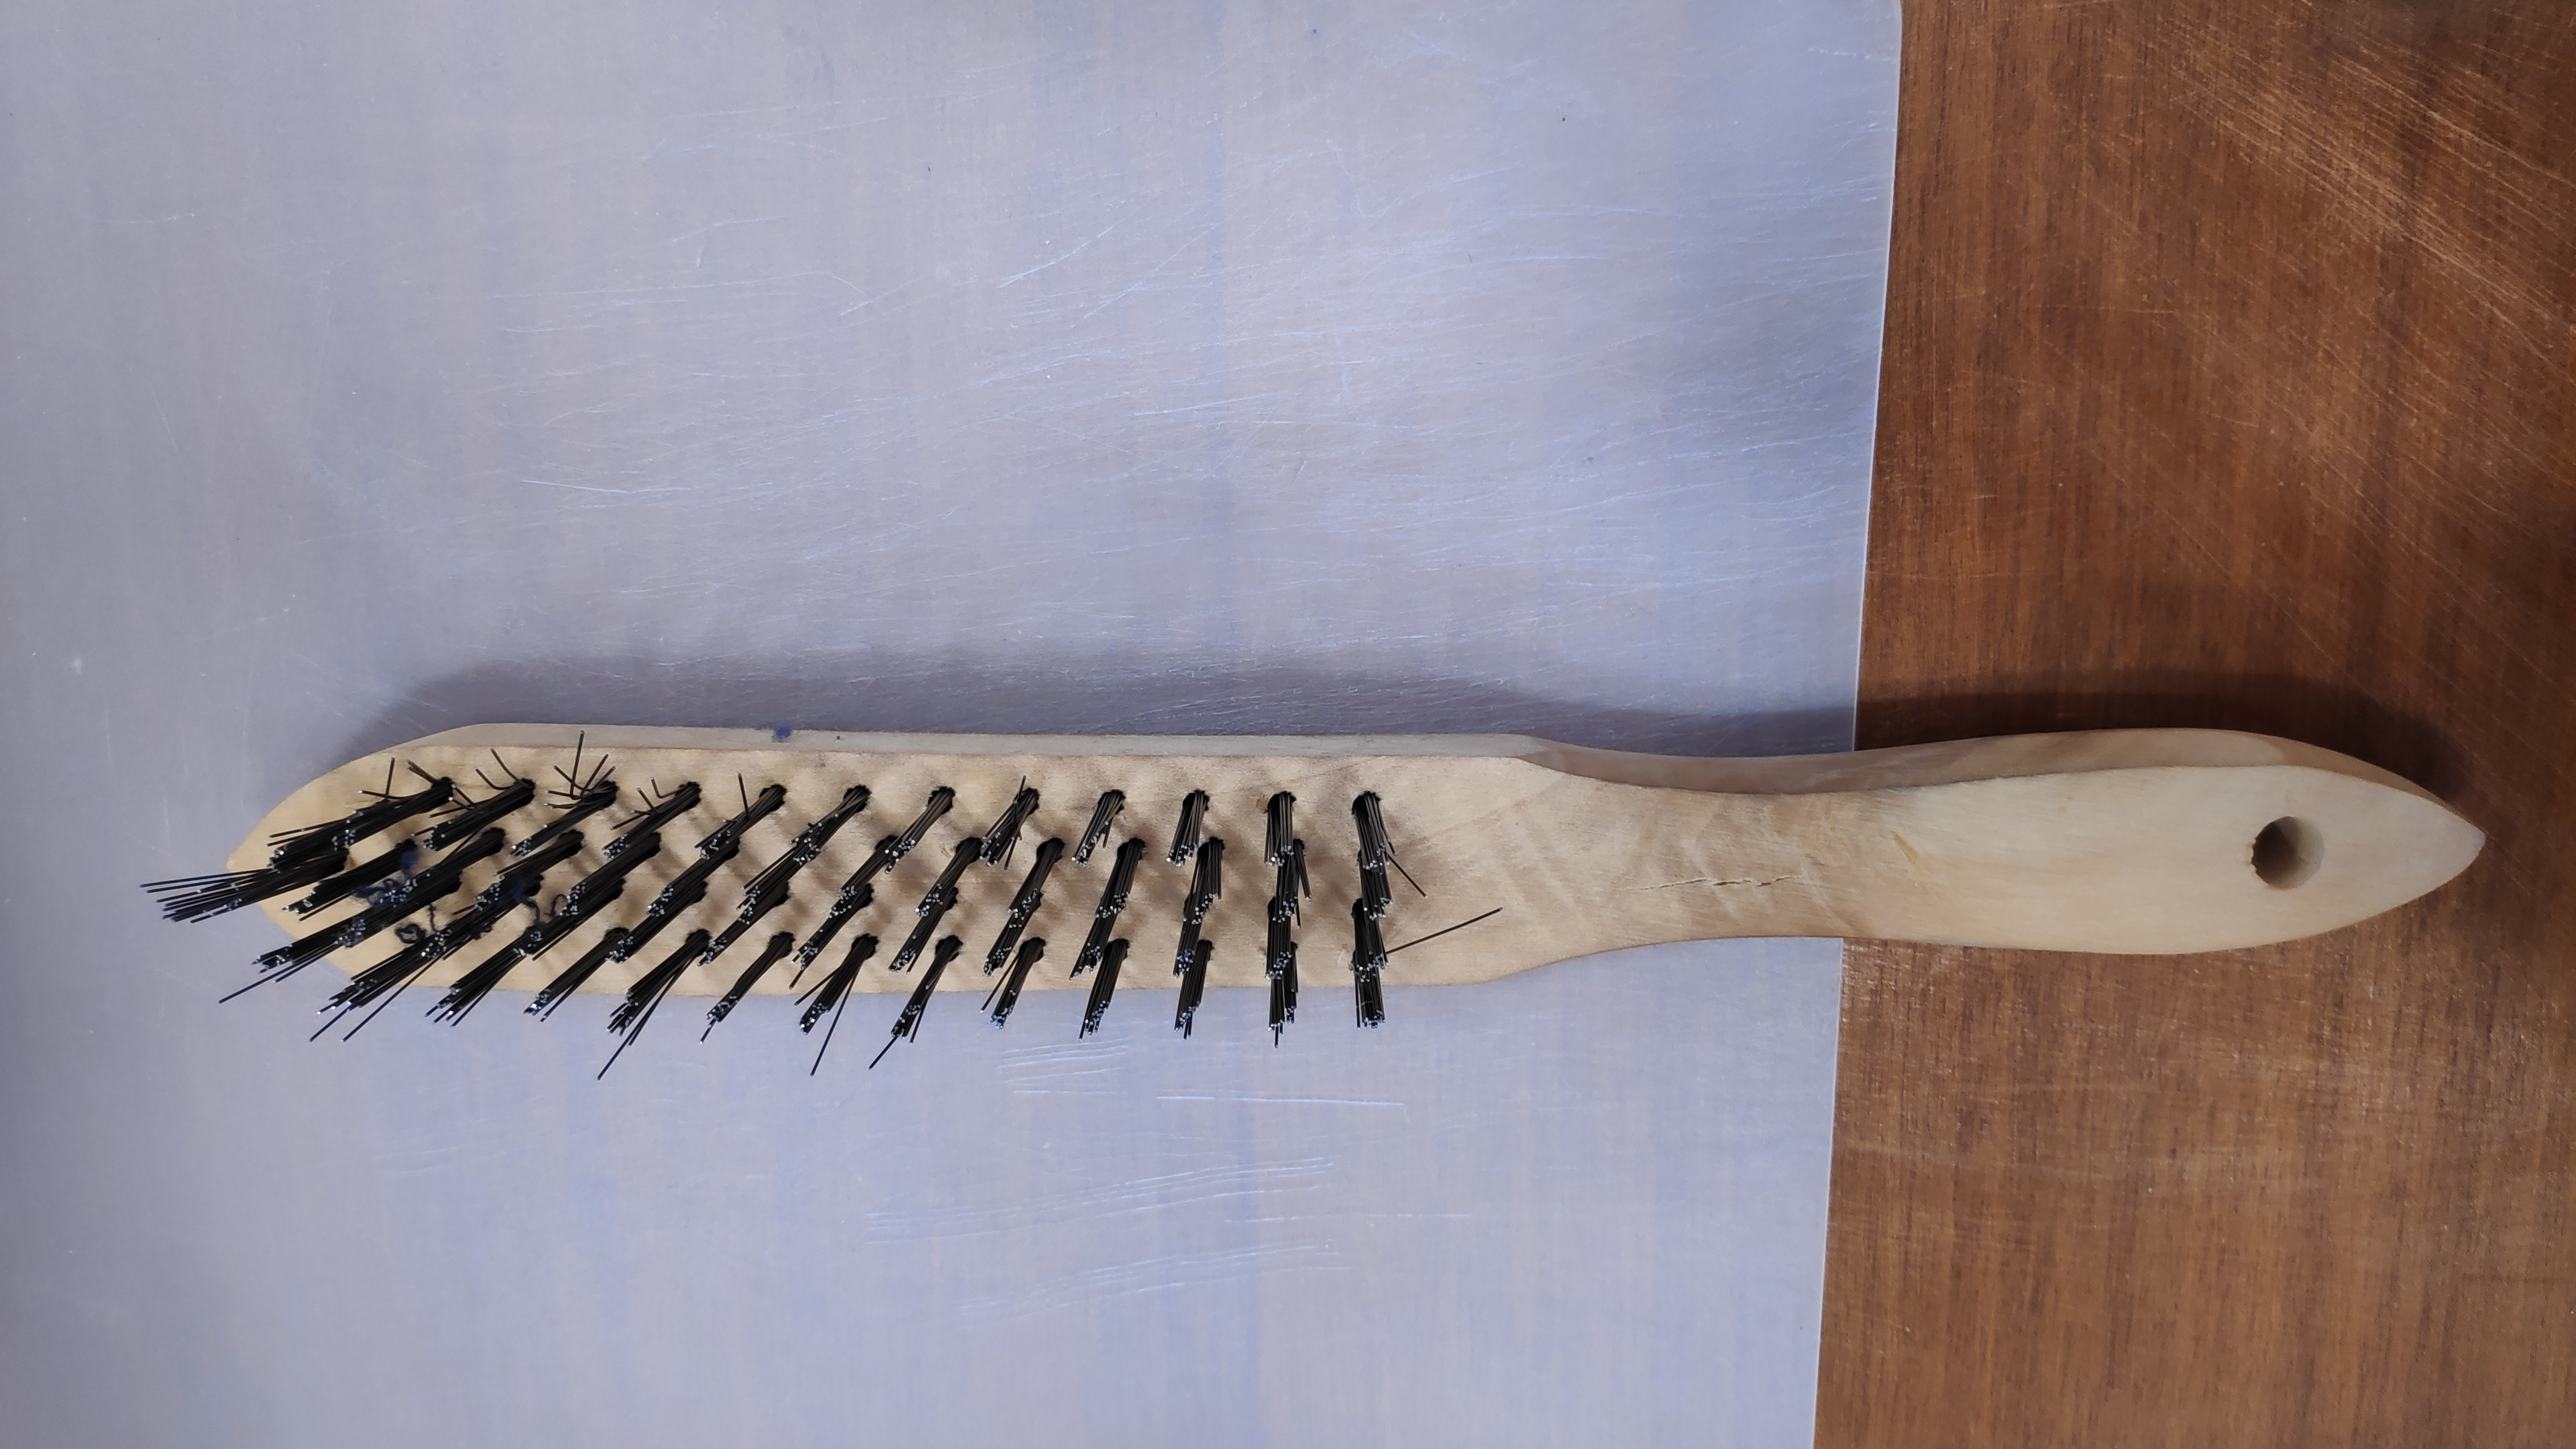
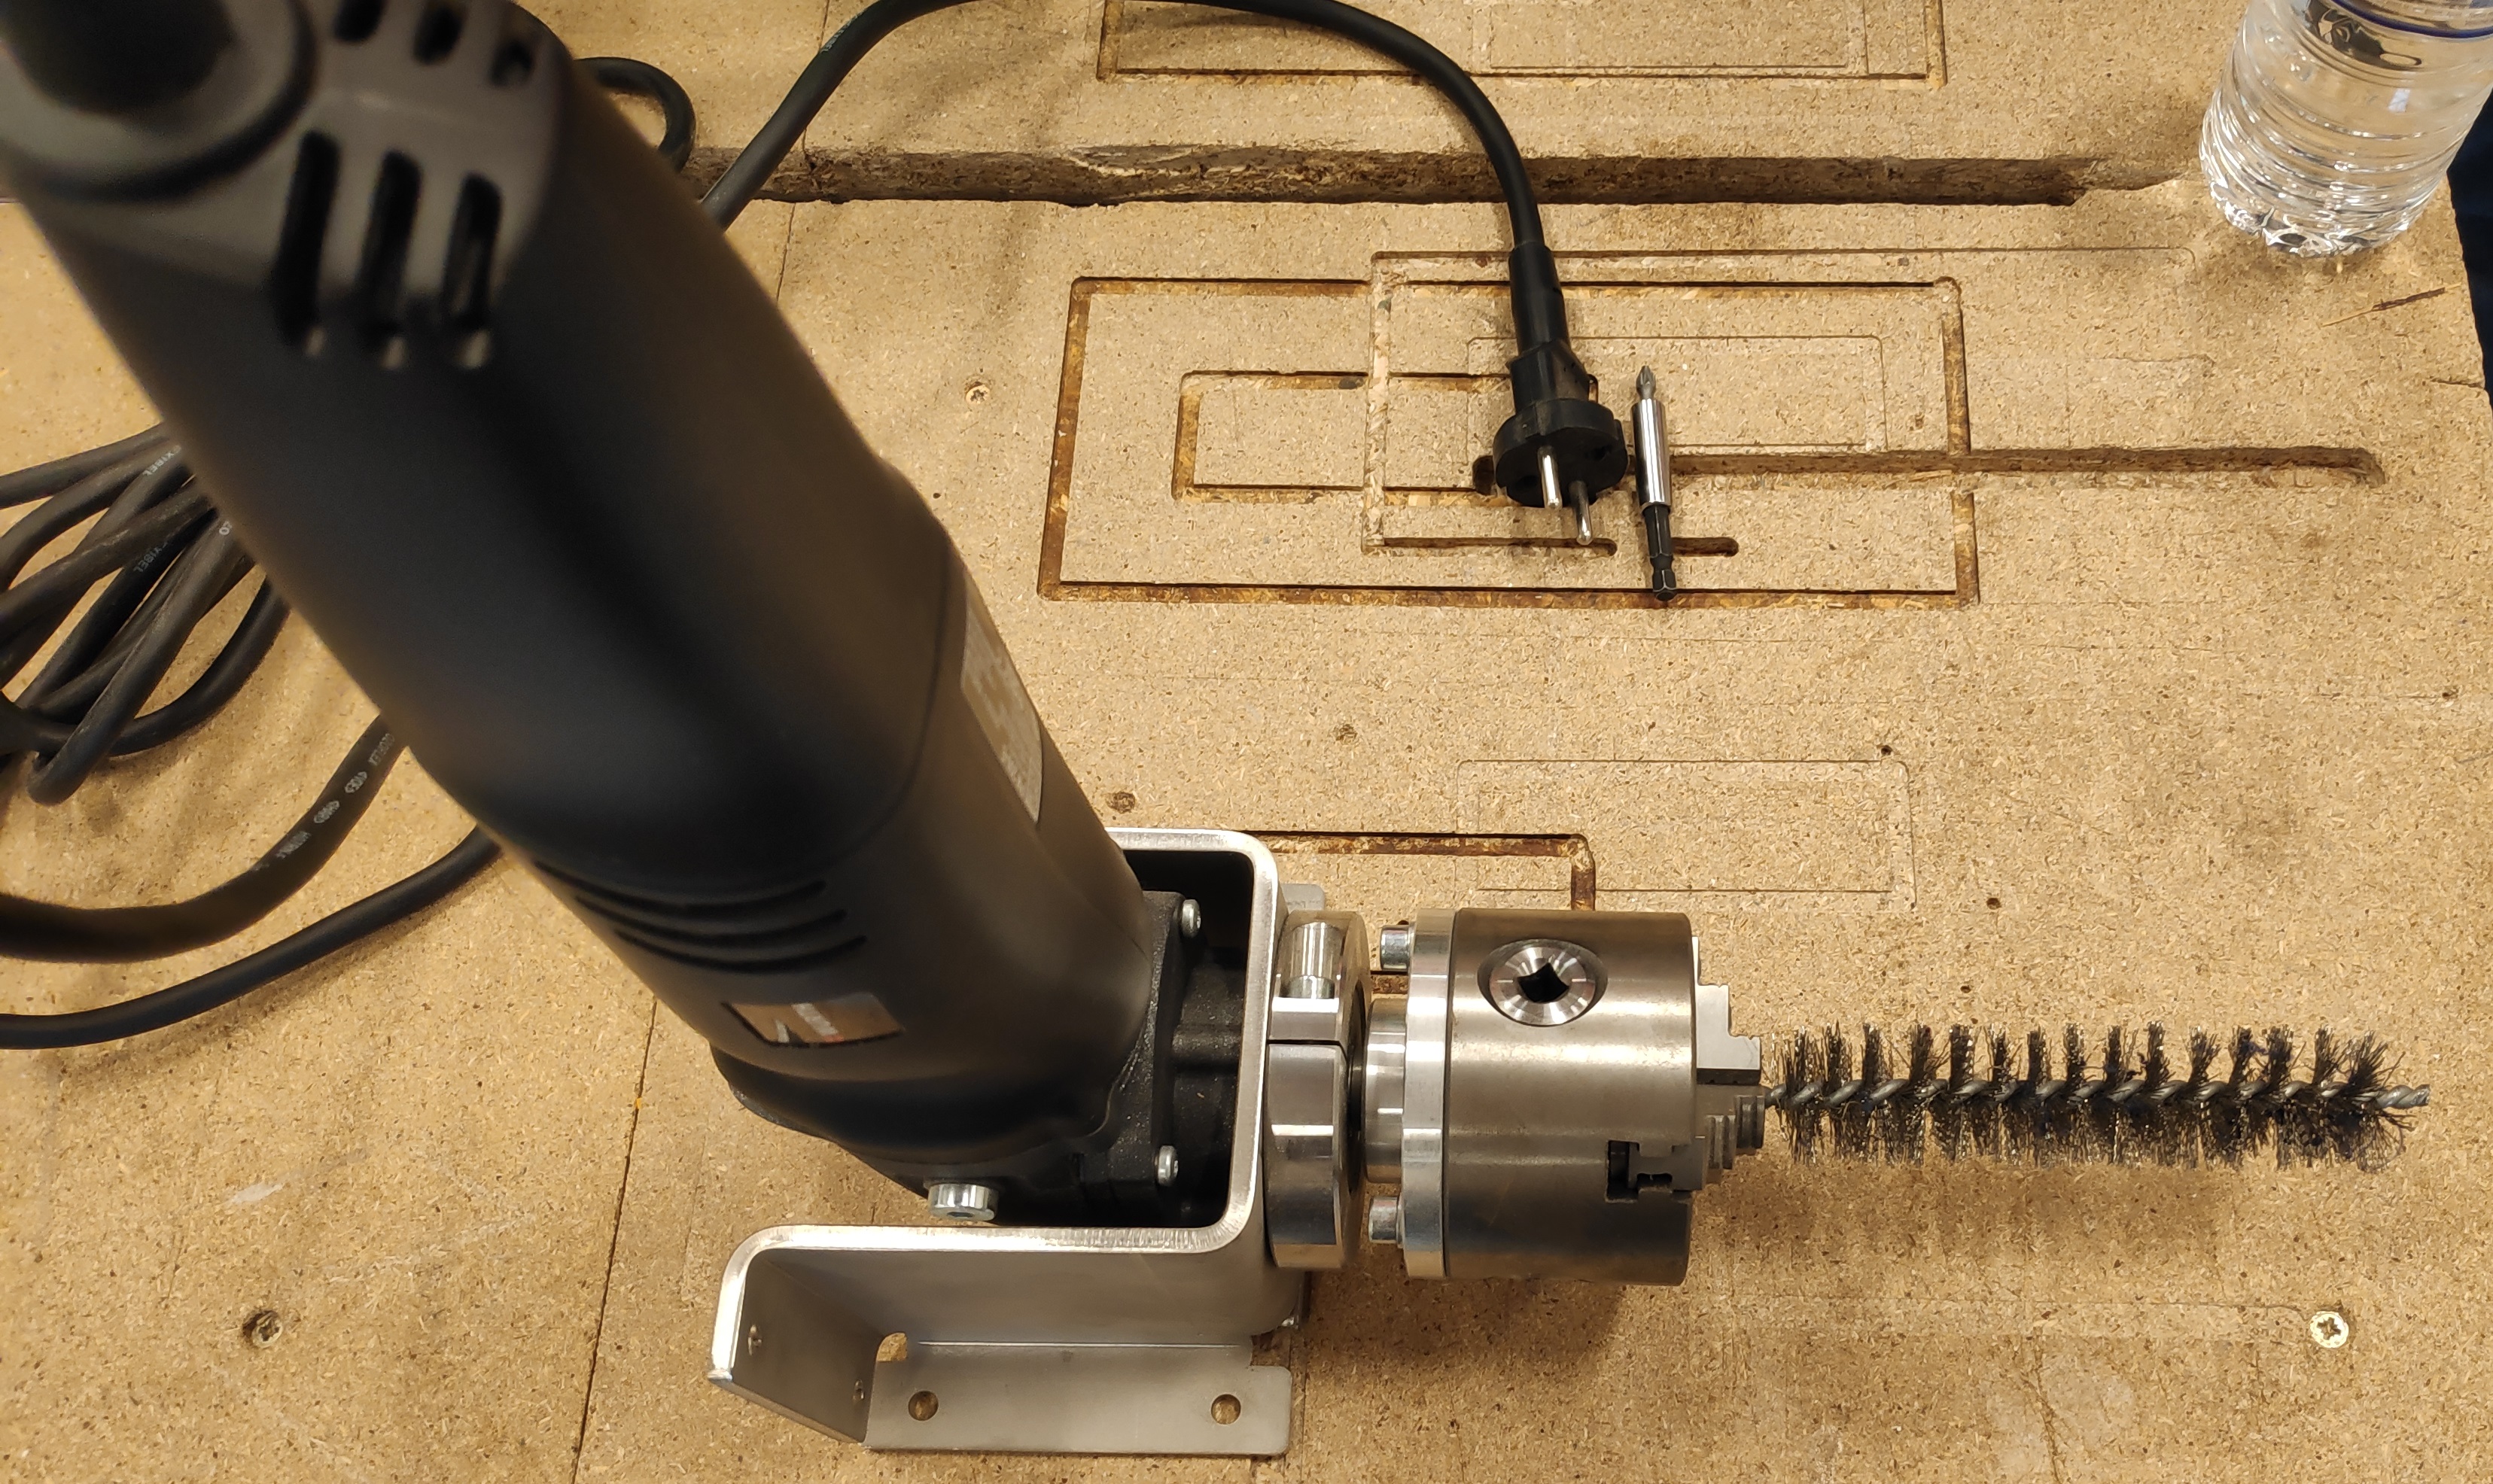
Our first tries were with the first brush, by spinning it and applying it against the fabric. To spin it fast we tried both a drilling machine as well as a lathe. Spinning the brush mainly leads to the fabric spinning around with it, it thus did not fray it at all. With the lathe, the brush did not hold in place as it was spinning too fast.
As it presented little result, we tried to use them slowly and manually, by brushing the cut edge of the fabric. We obtained better results, but it was really slow and tiring. The edge was kind of frayed, with small threads, which some would curl up around the brushes.

10. Renewal (13/12)#
Looking for a real brush#
We went to Tom&Co to look for a brush for animals. Unfortunately, they told us they didn’t think it would work with fabric and went to Veritas, where we found nothing. So we went to a seamstress who told us to go to Schneipper, where we found nothing. We were hopeless whether we could find a solution or not.
11. Fail: Brainstorm (18/12)#
In search of fresh ideas and solutions, we found ourselves in need of assistance. Turning to Melanie and Thomas from the FabLab, they guided us back to the basics of “Physics 101” and outlined a strategic approach. To reverse the fabric fabrication process effectively, we first needed a comprehensive understanding of the initial manufacturing processes, including the various types of meshes involved in sewing fabric. Melanie and Thomas provided valuable insights by guiding us through the fundamental steps required for a successful reverse engineering.
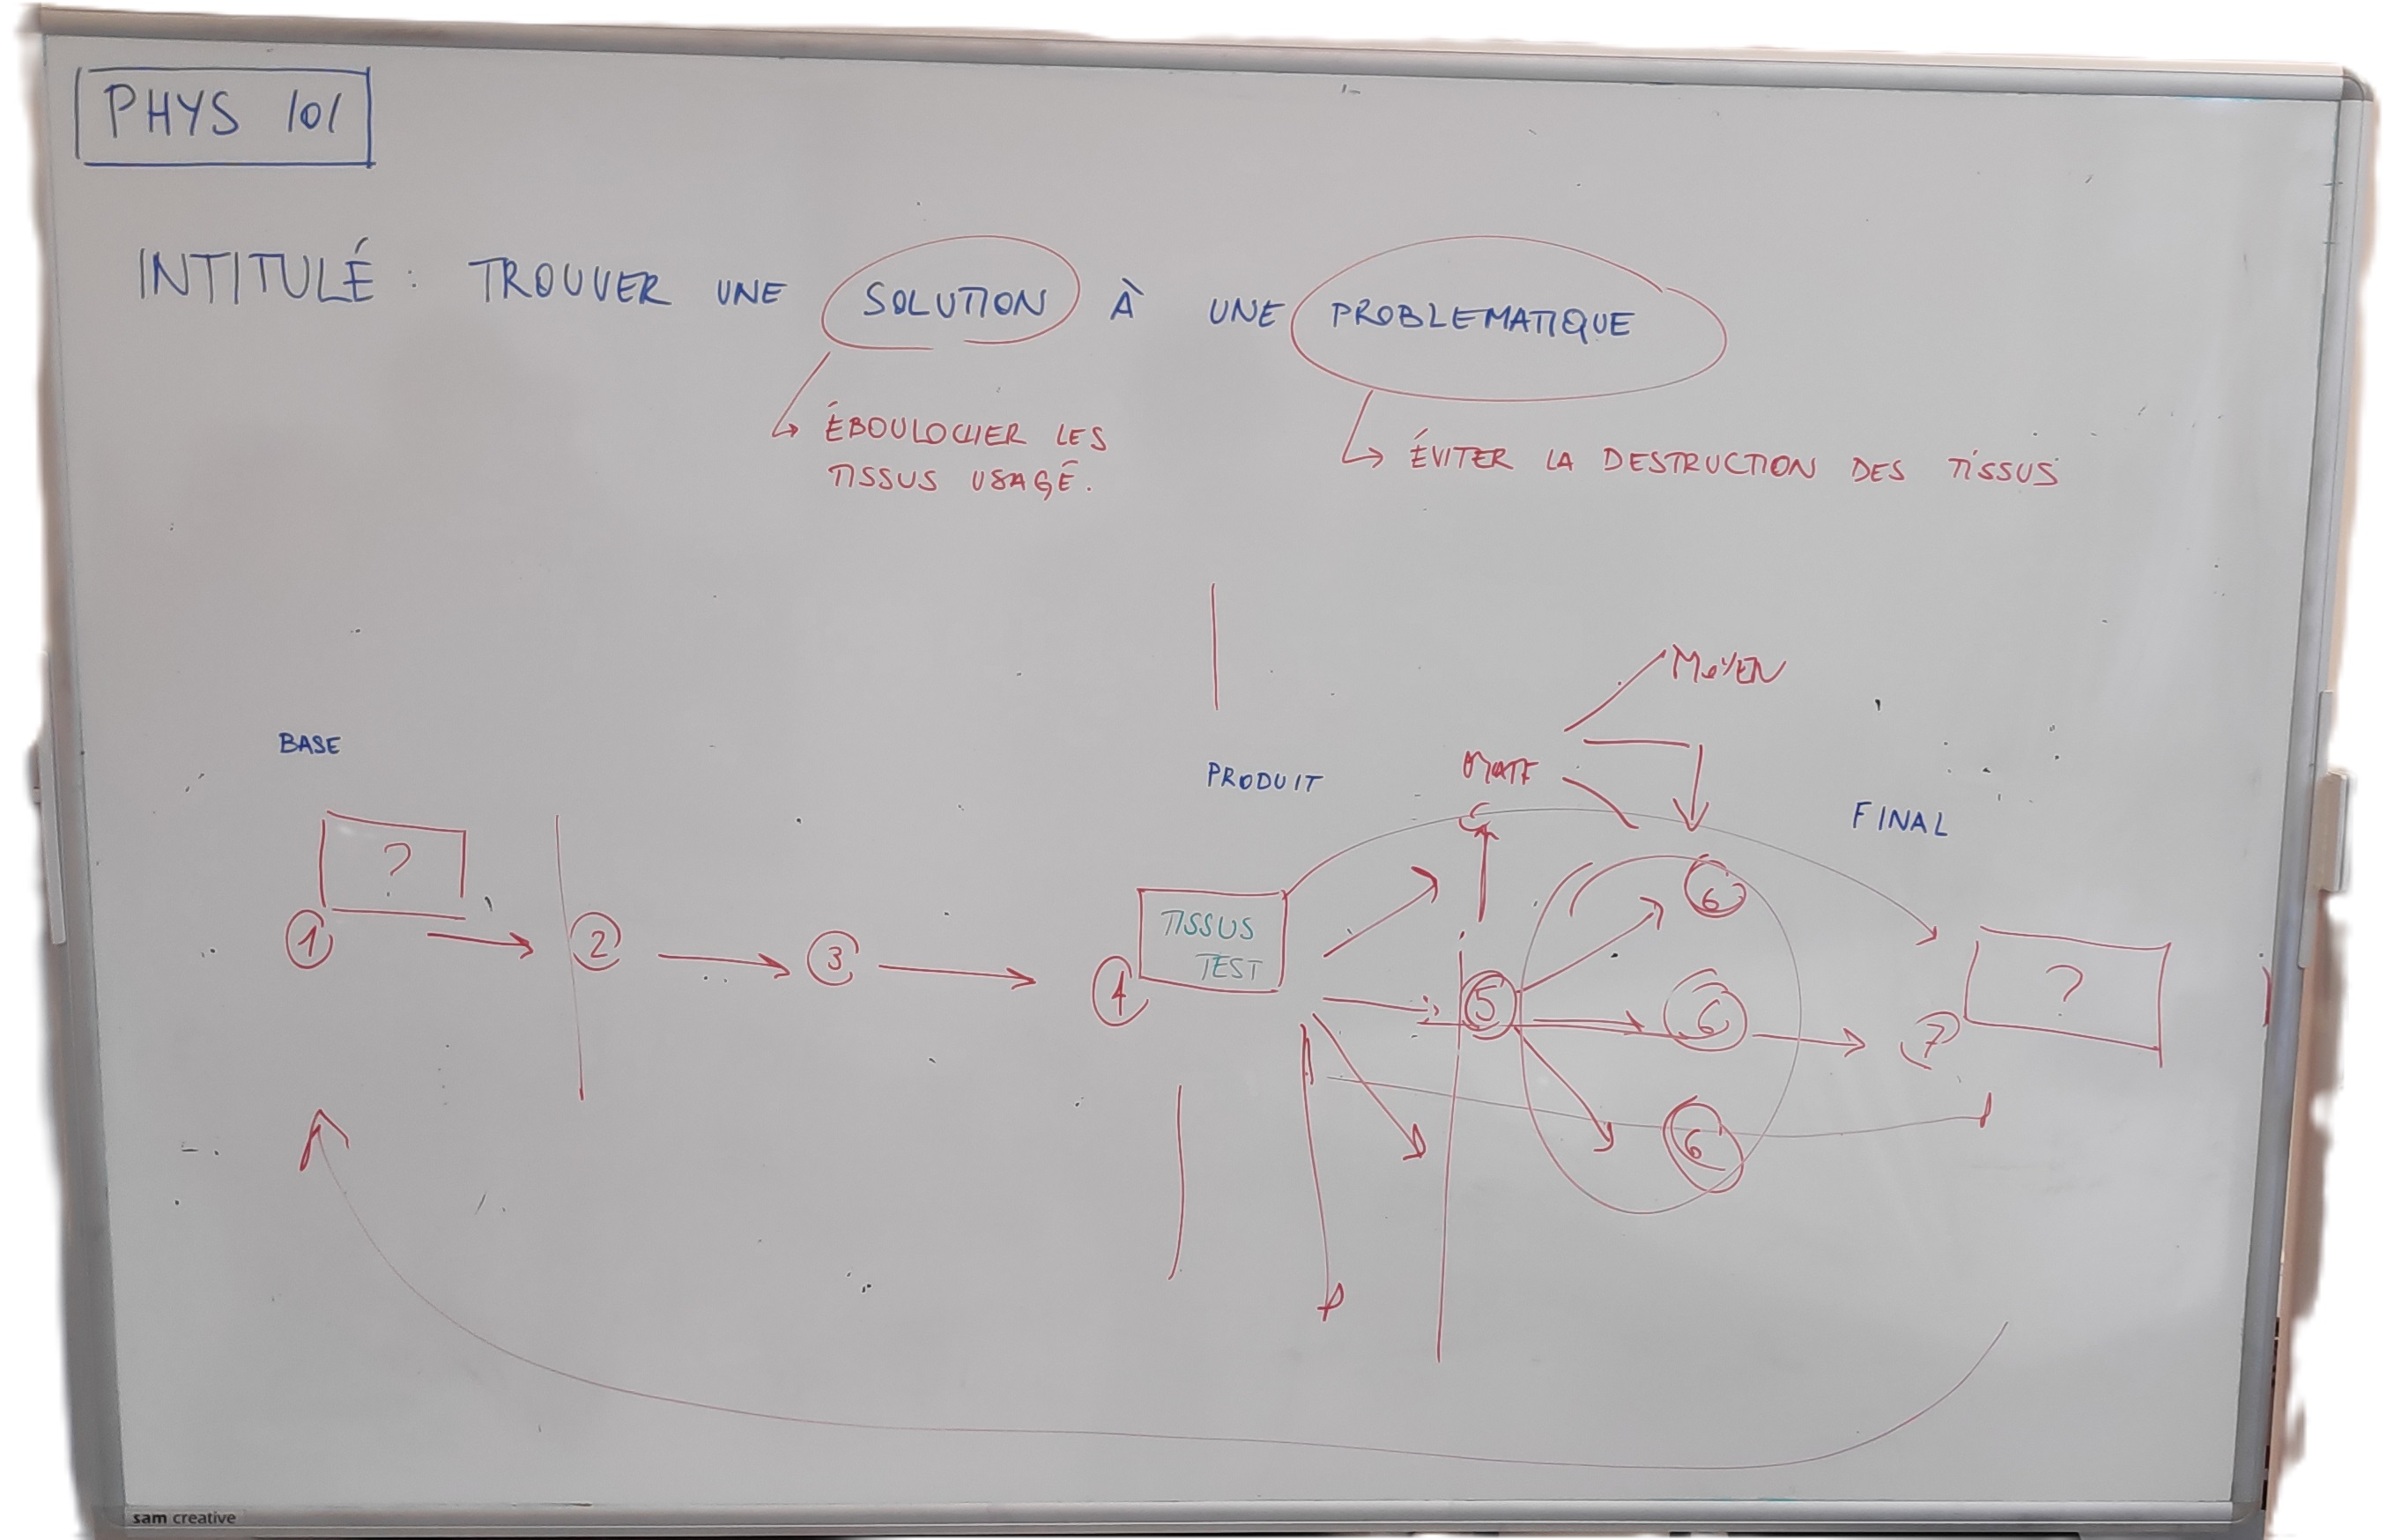
We then set on different tasks for us to do :
- Researching about the different kinds of meshes
- Researching about the process of making fabric from the raw materials
- Trying different kinds of destroying methods on different types of fabric, based on the reverse engineering of making the fabric initially.
- Expanding the possibilities for our final products, based on the results gotten by destroying the fabric.
Research about the fabric#
We learned about how the fabric is made here. We then knew we needed something that cut through the fabric instead of just pulling the fabric apart.
We also learned about the fabrication of polyester and thought about melting it.
Melting#
First, melting clothes can be dangerous. We thought about melting polyester because polyester is created by cooling down fibers of PET (see Fabrication). After our research, polyester is very dangerous because it can release toxins such as carbon monoxide, acrolein, and formaldehyde.
Sanding#
Sanding worked pretty well but we couldn’t hold the fabric tightly enough. Even with the fabric tighten up by nails, the sander would create a hole through the fabric. Moreover, the process of sanding is very noisy.
Clothes Moths#
Clothes Moths are known to destroy textile, so we thought about buying clothes moths to test them on our clothes. The only problem is that nobody sells clothes moths. Also, the outcomes of the process would likely be complicated to work with…
12. Our final prototype (19/12)#
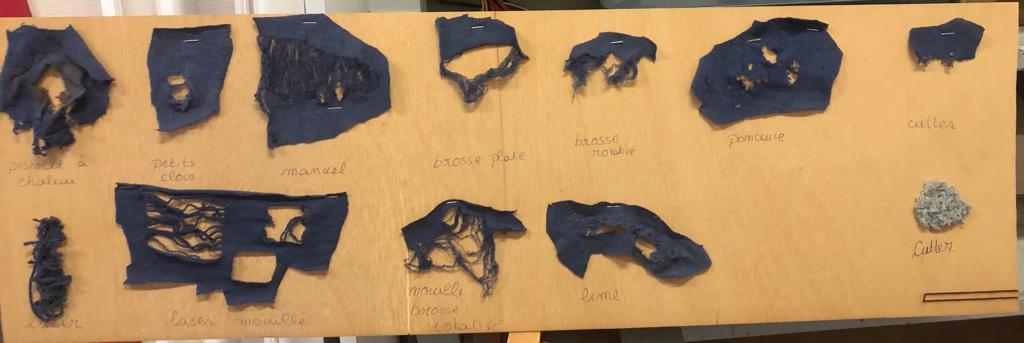
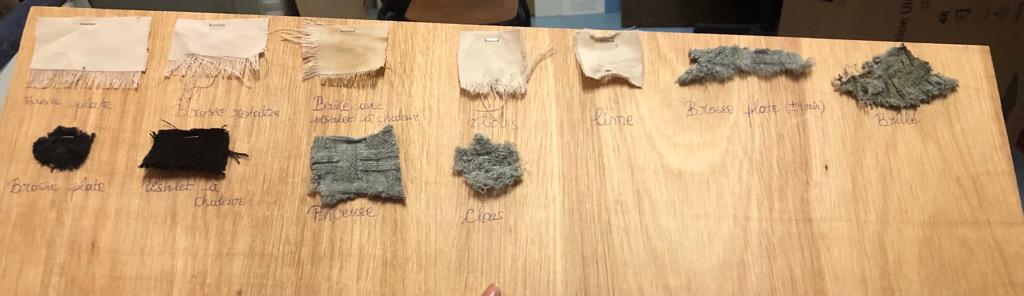
New Tests#
After our meeting with Melanie and Thomas, we compiled all our results onto a board, documenting the outcomes of the various techniques we employed. While some tools performed as anticipated, others did not meet our expectations. To gain a comprehensive understanding, we systematically tested each tool on different types of meshes. This thorough exploration allowed us to identify the tools and methods that proved effective across different fabric compositions and meshes. This approach allowed us to gather results that could inform us about the possibilities and limitations of each material.
With the results we would obtain, we could determine what could possibly be done with it or not. We then should also conduct research about what can be done to reuse small fabric pieces. We experimented with various types of meshes, including woven and knitted fabrics. Additionally, we conducted tests using different materials such as cotton, polyester, and acrylic.
When we tested our fabric with the laser, we noticed that cutting it into small strips brought us closer to the desired result. That’s why we came up with the idea of using blades that would run through the fabric multiple times.
Blades#
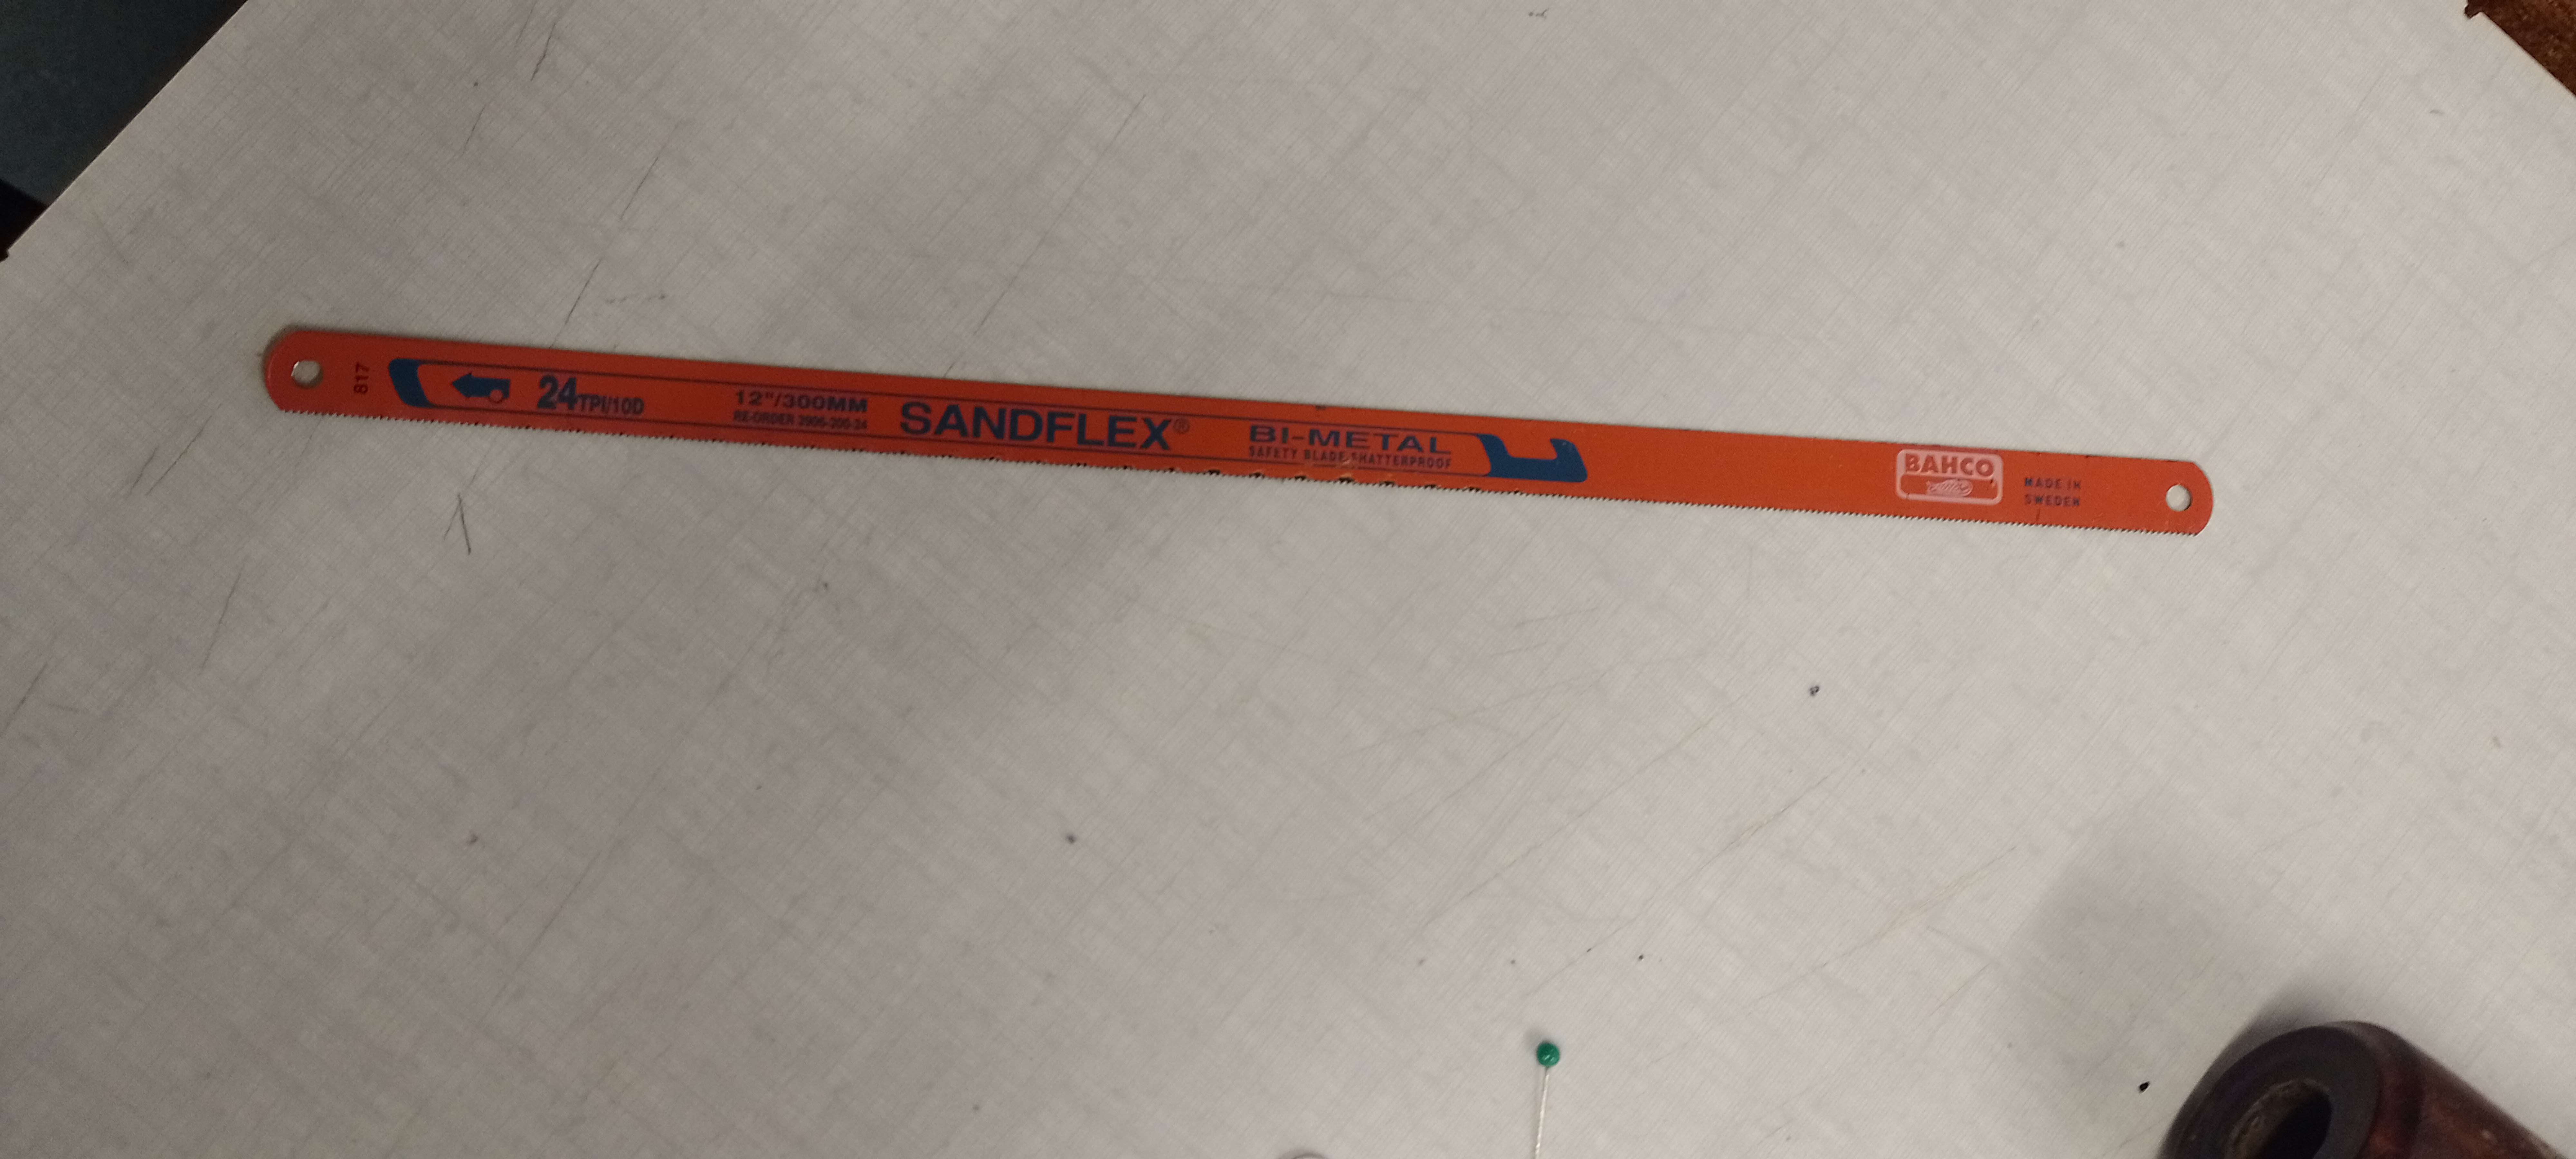
These are the blades we’ve chosen for our project, and we purchased them in a shop. They were a bit costly at 20 euros for a set of six blades.
We tried them on the fabric which gave us a good result.
Test with the laser#
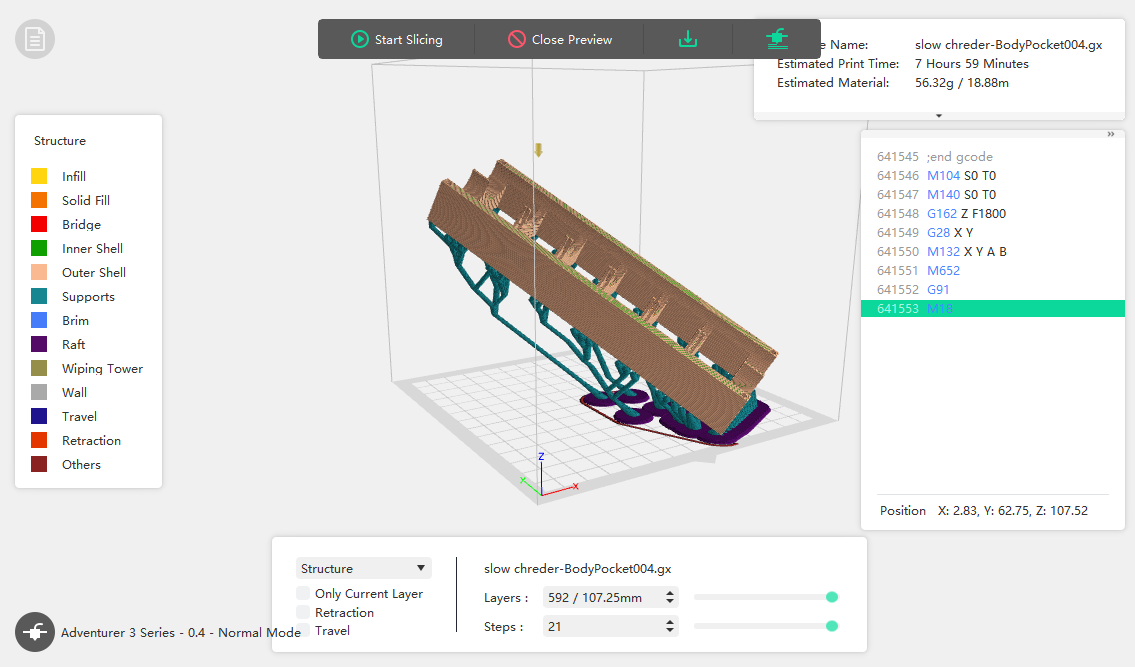
Initially, we designed the blade-holding object with the intention of using a lasercutter. However, we encountered precision issues as we utilized the lasersaur, realizing that the components did not align as expected and failed to hold together effectively. So, that’s why we used the 3D printer to print our objects. Nevertheless, it allowed us to confirm the physics of the model, before going through 3D printing which is way slower.
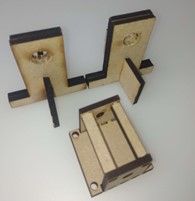
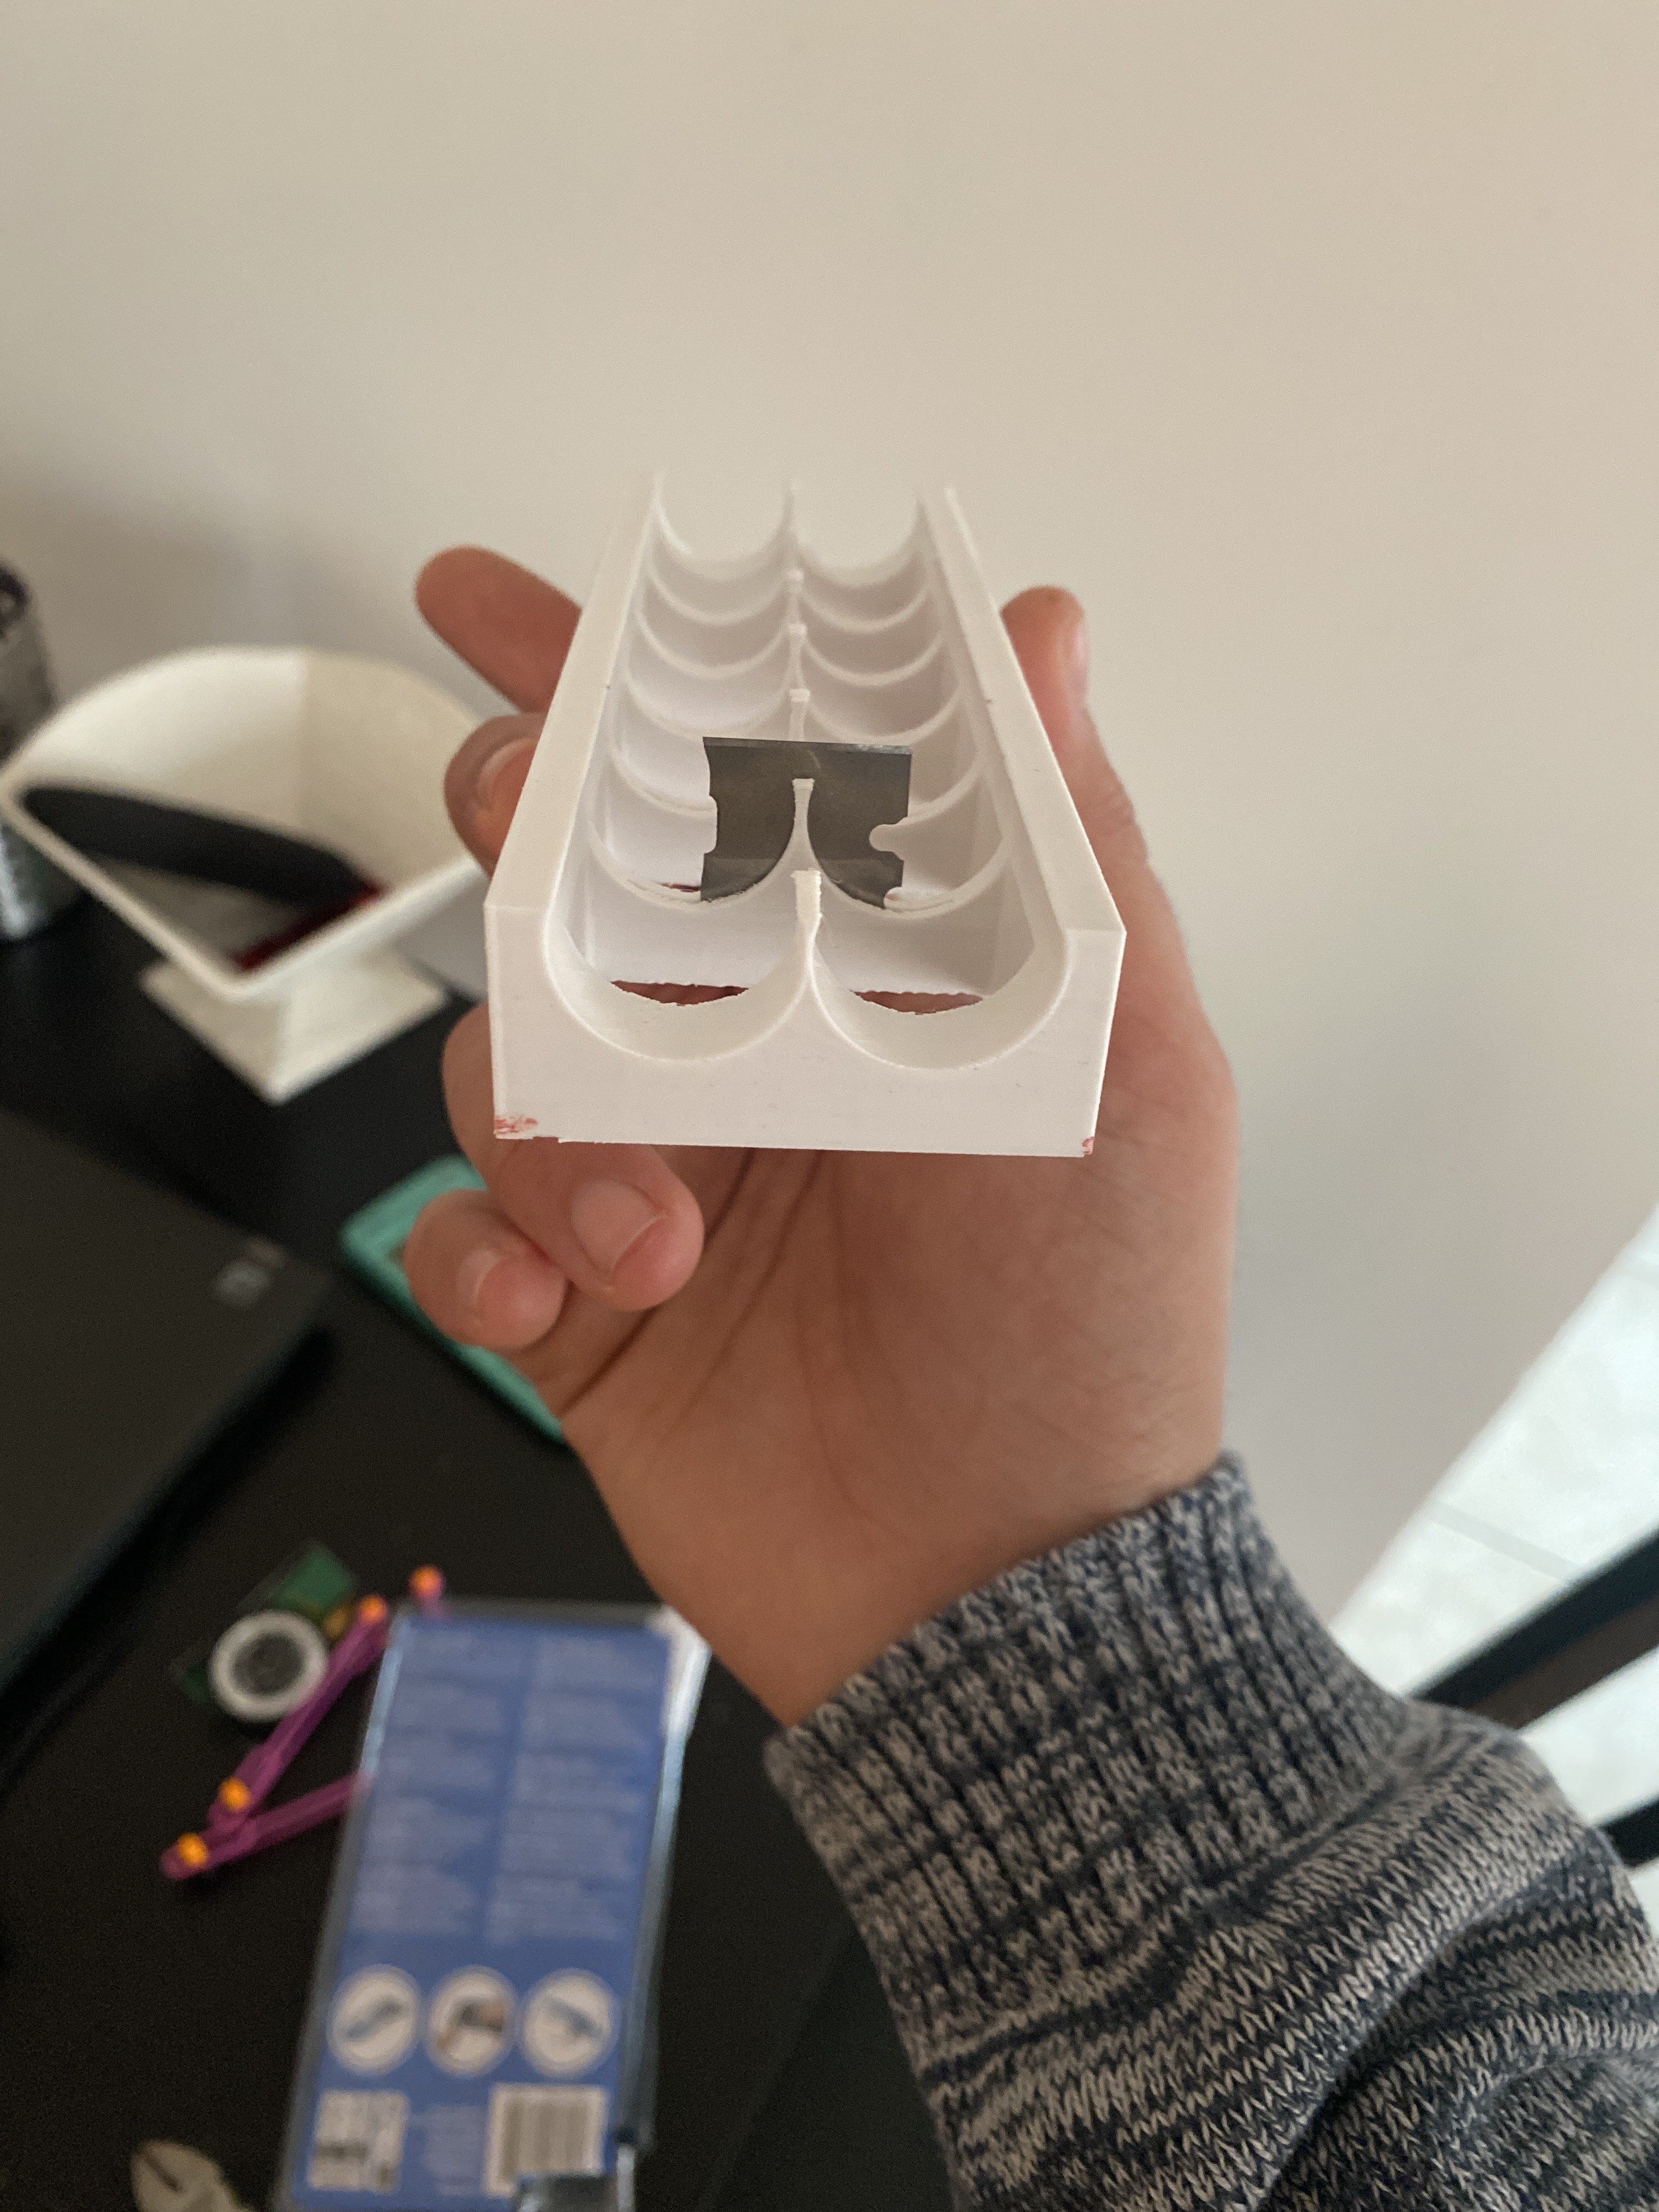
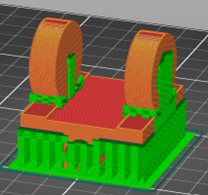
3D printing#
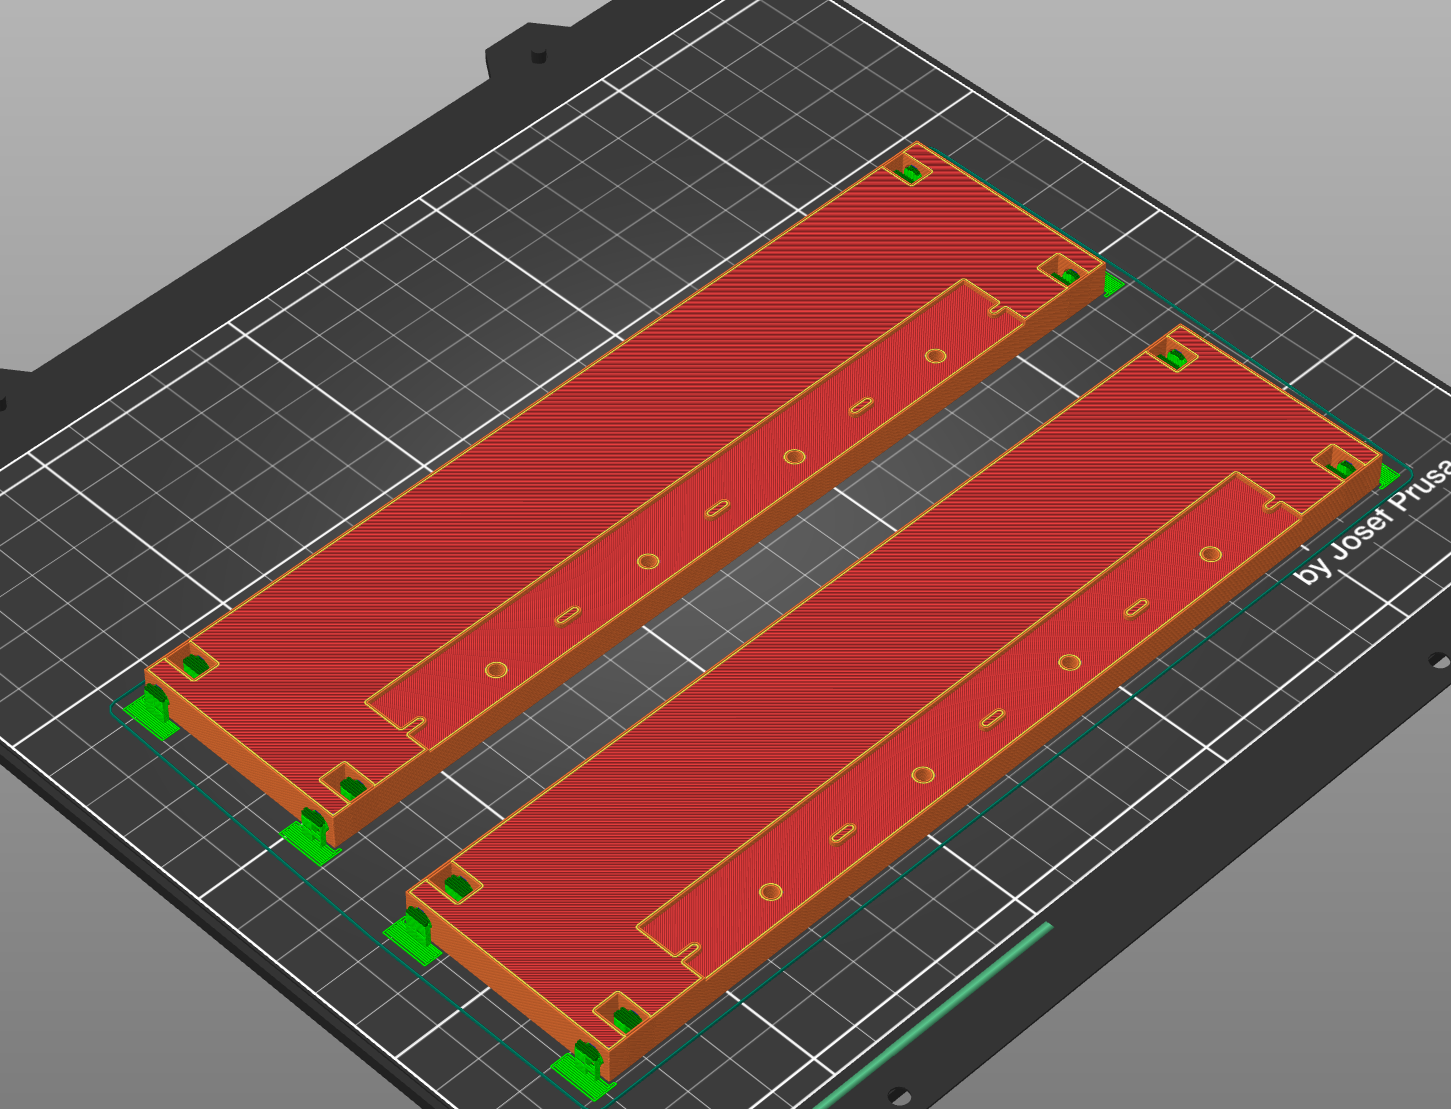
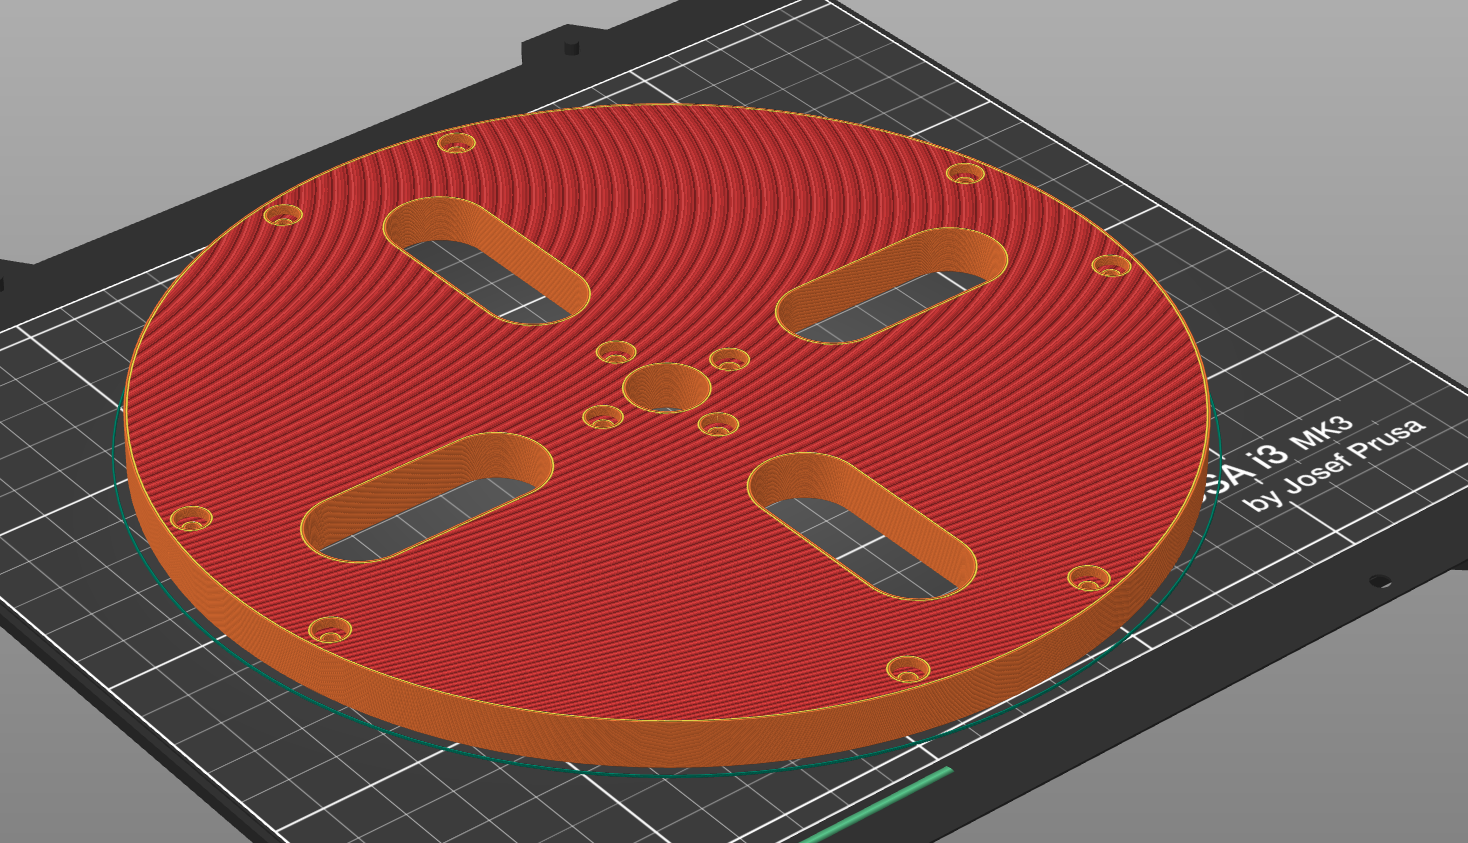
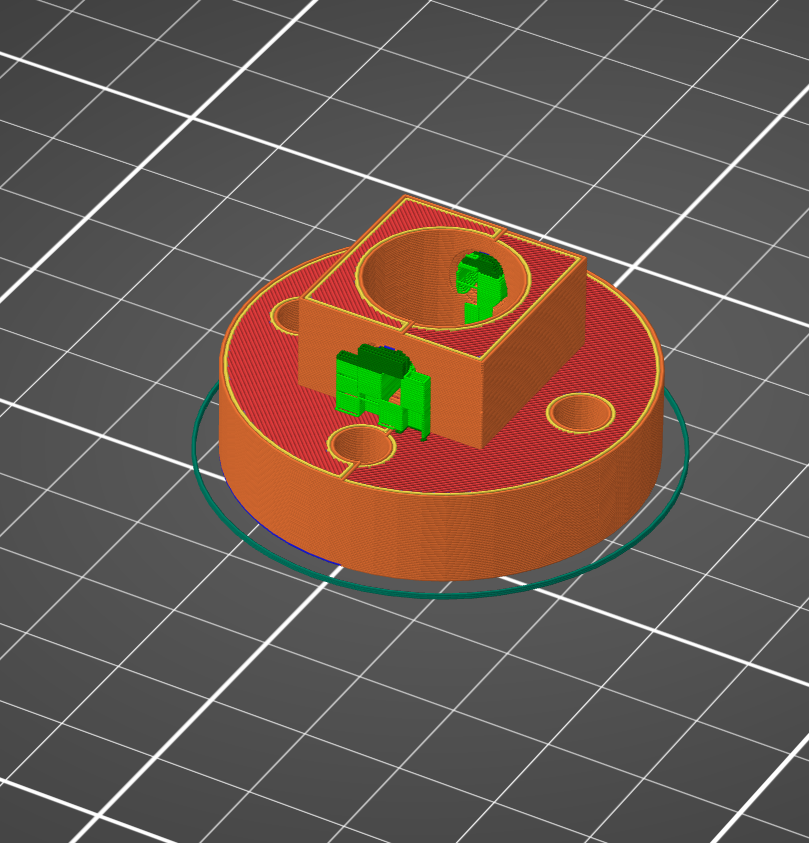
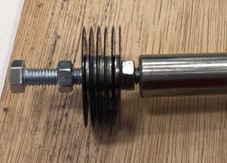
We designed this final prototype as to make it slide on a metal axis we had come across in spare parts. The goal was to be able to roll the blade easily on the clothes, and then move the clothes bit by bit. We thus designed holders for the axis, as well as a sliding part, that would slide on the said axis and hold the blades.
Final Result#
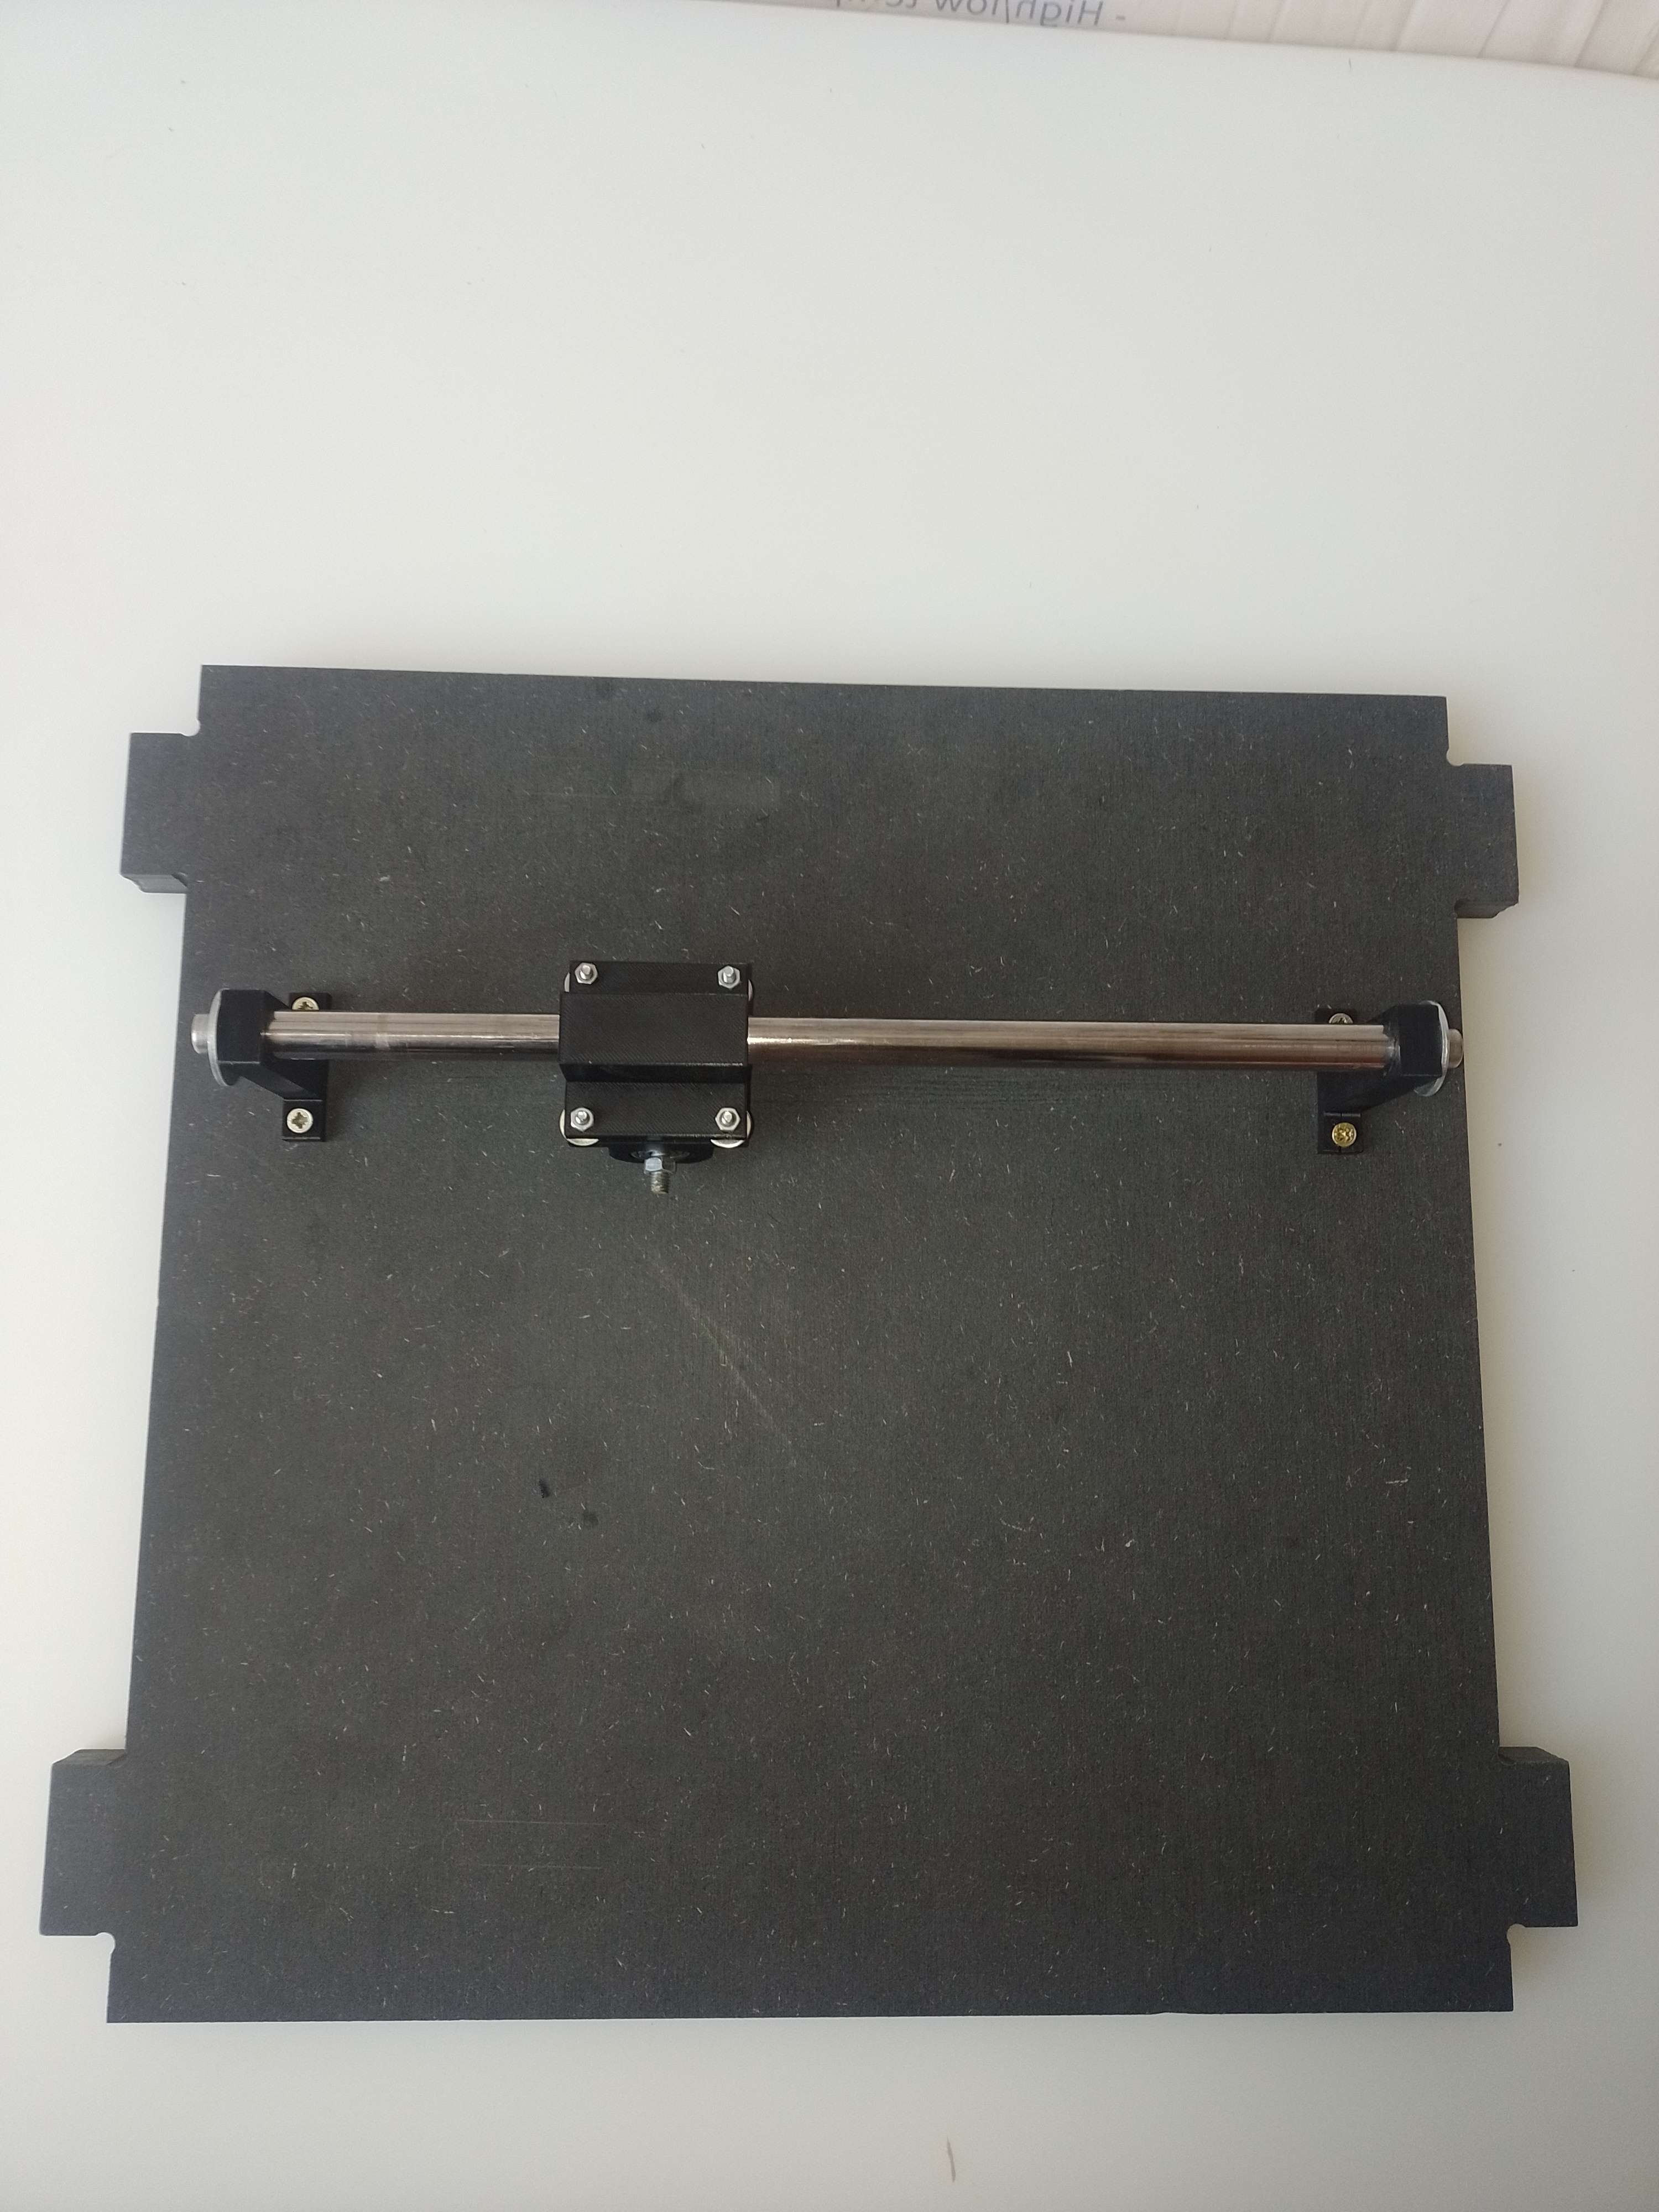
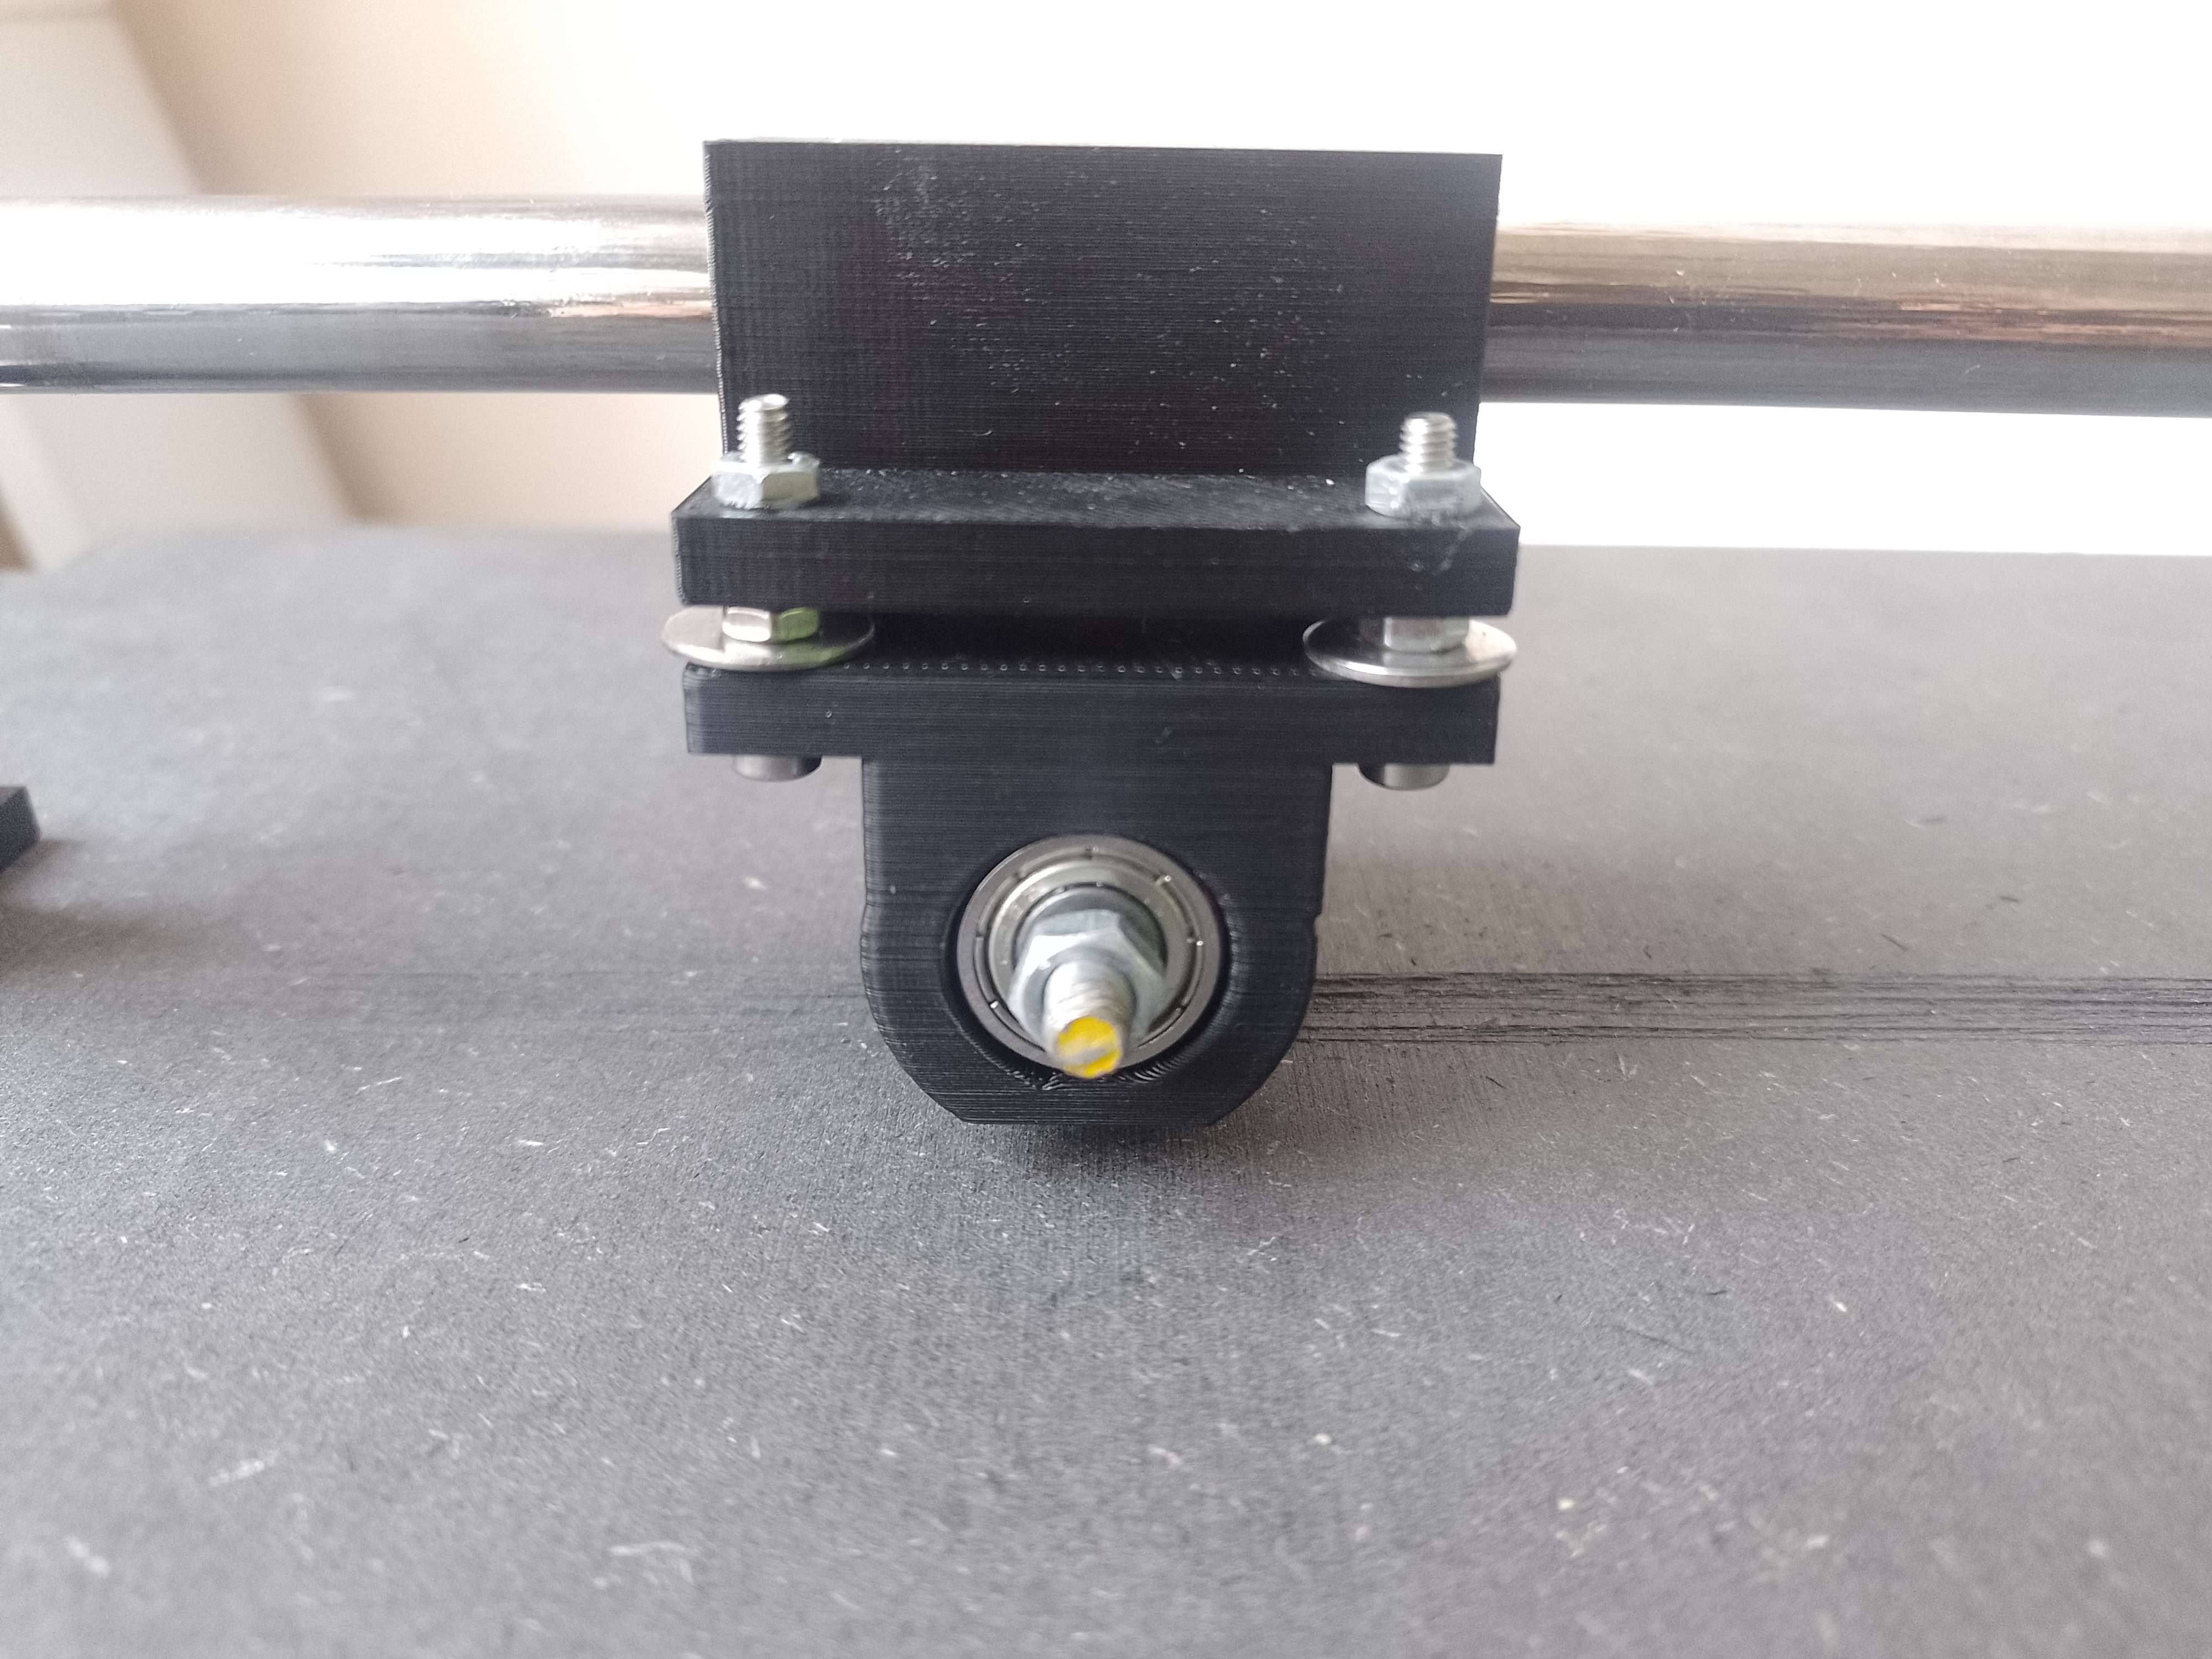
The result of the fabricut on different materials:
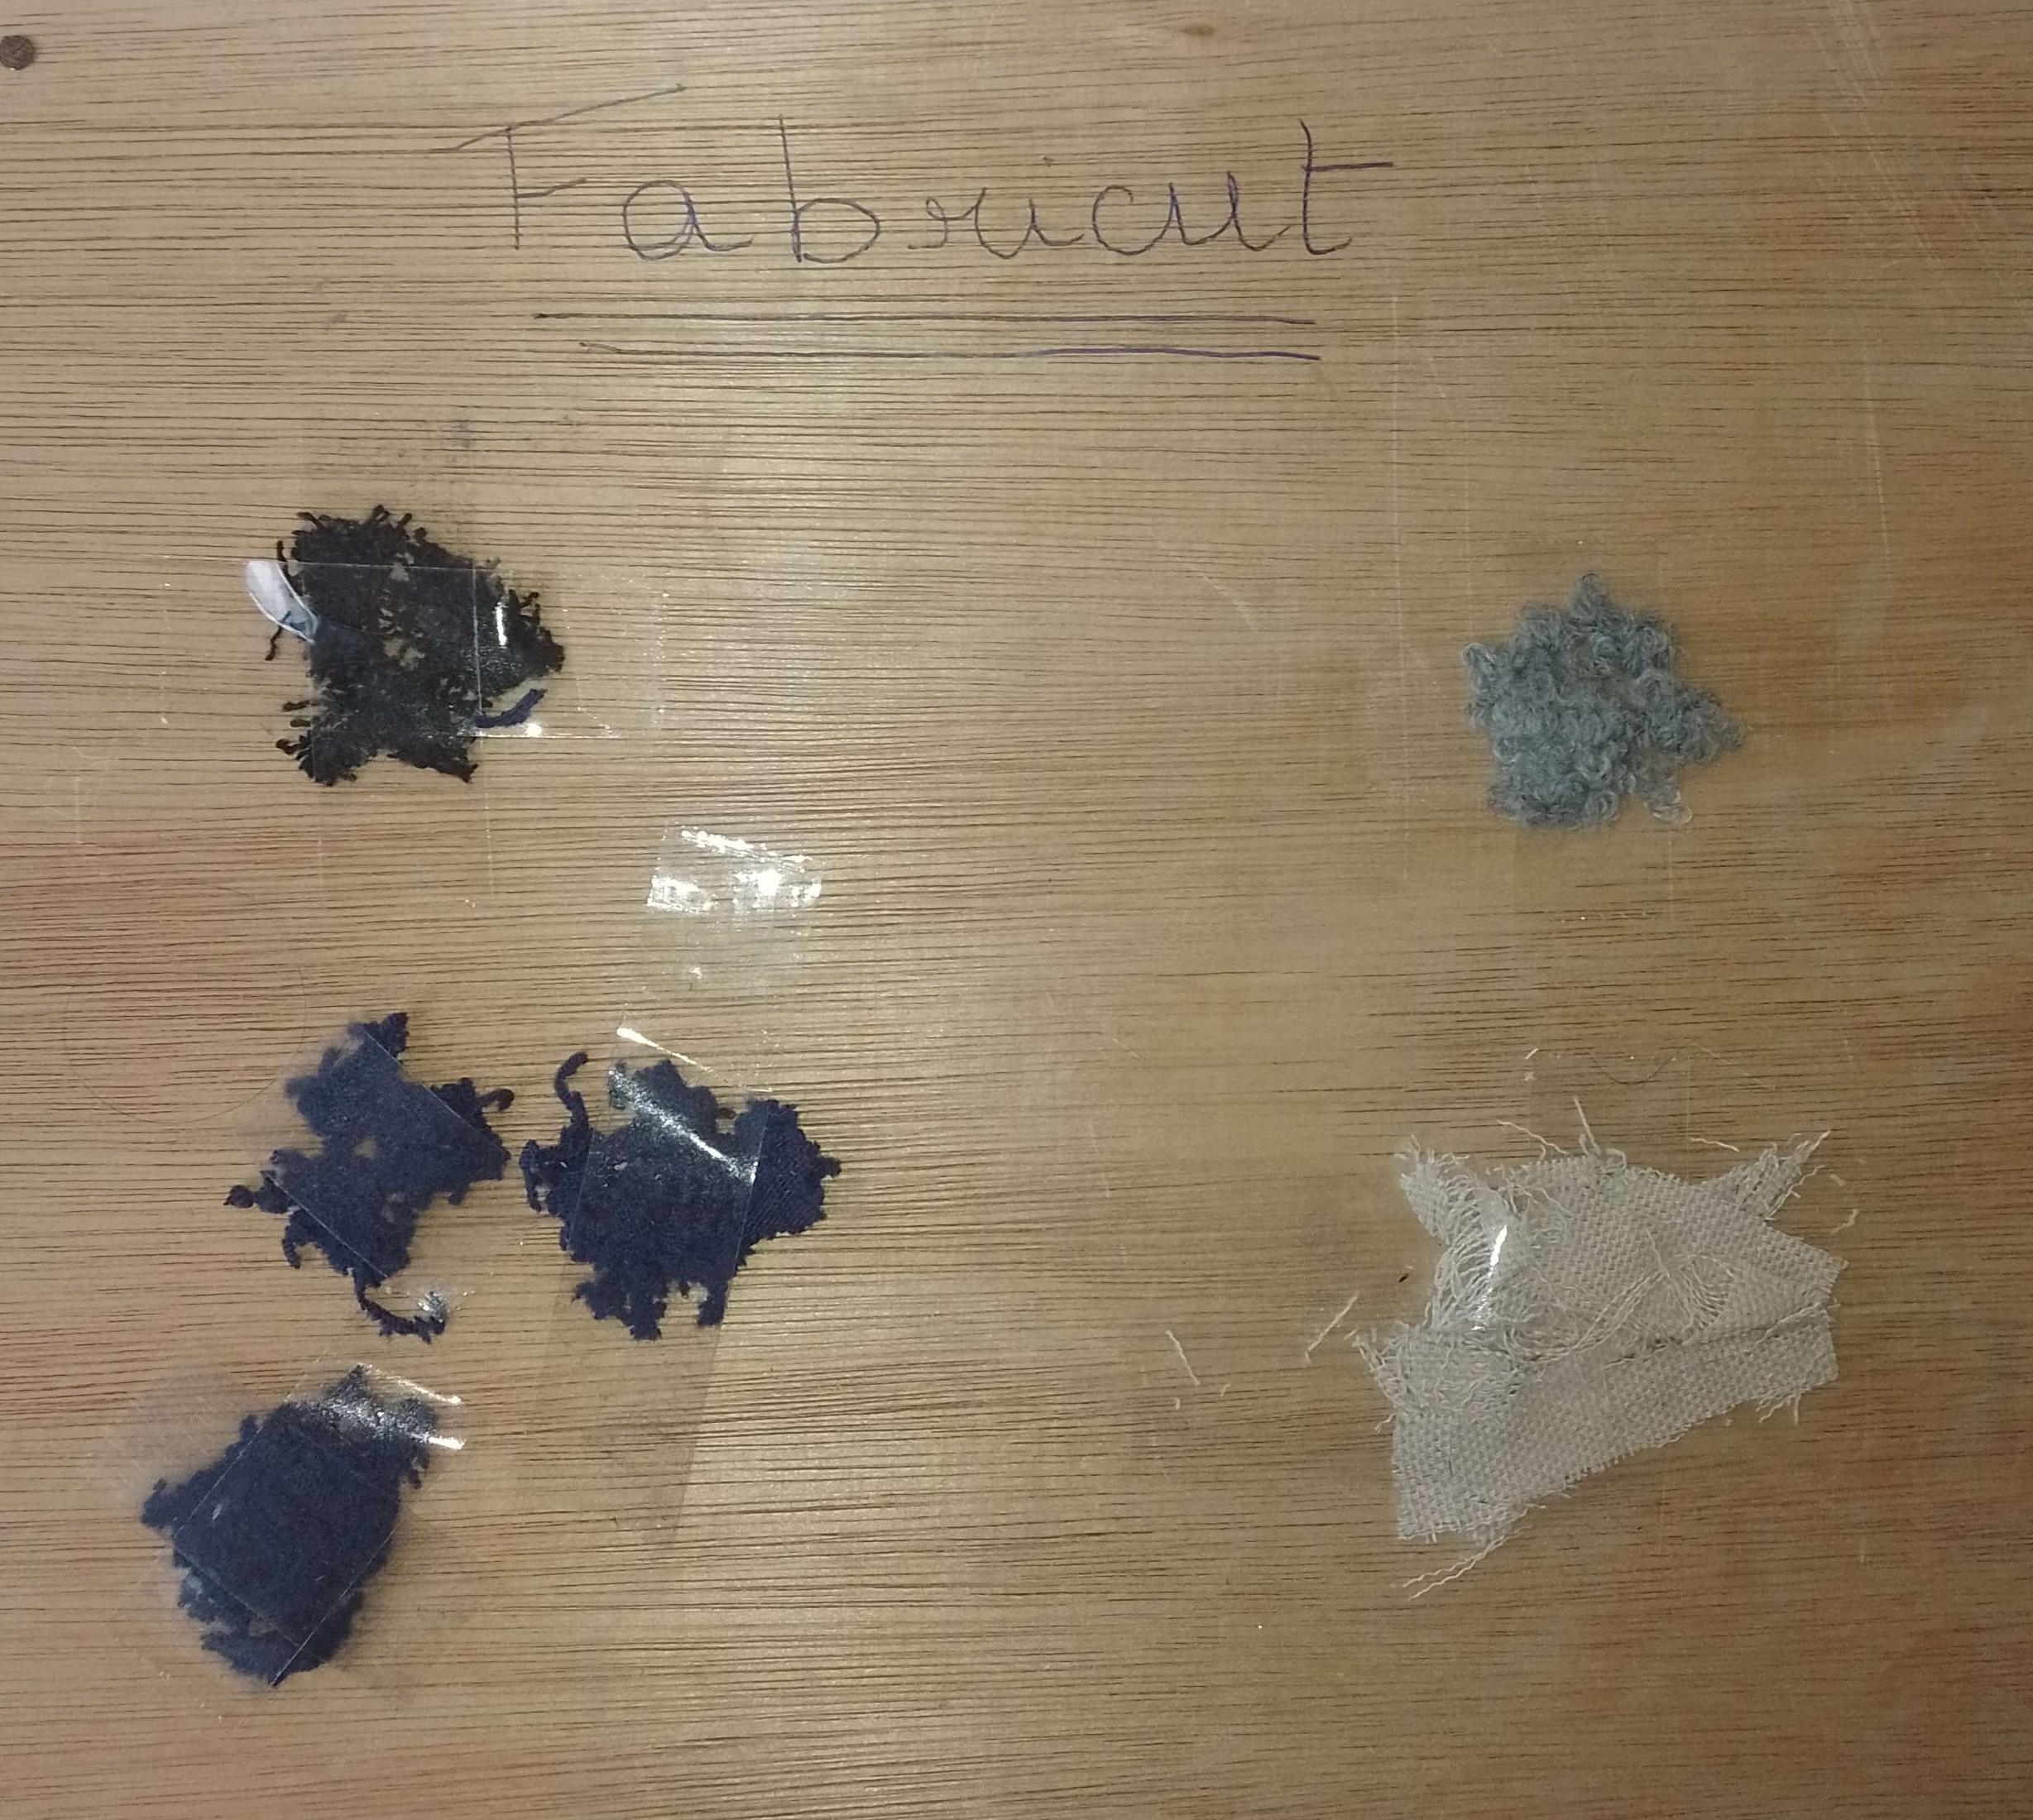
As you can see the obtained result is quite close to the one expected. With this we think it could actually be possible to create new fabrics.
17 sustainable development goals of the United Nations#
Our challenge aligns most closely with Goal 12: Ensure sustainable consumption and production patterns.
We developed a machine designed to fray fabric efficiently, aiming to reduce clothing waste and promote responsible consumption. By creating a tool that enables the effective utilization of textiles, we contribute to Goal 12 of the United Nations, which emphasizes responsible consumption and production. This innovation seeks to minimize the environmental impact associated with textile disposal, supporting a more sustainable approach to the life cycle of clothing. Through minimizing waste and promoting the efficient use of fabric, our project shows our dedication to sustainable practices and supports the worldwide initiative for responsible consumption and production goals
13. Suggestions to improve our project#
- We could have use springs between the slider piece and the piece with the blades to avoid too much damage to the blades. Those unfortunately seem to wear out quite fast.
- Motorize our project, in order to make it easier and faster to use.
14. Group dynamics#
We used utilized Trello to facilitate effective task distribution within our group, ensuring that everyone can contribute to the project. Trello is a project management tool that enables us to organize and allocate tasks efficiently, promoting collaboration and ensuring a coordinated effort from all team members.
Here’s an example of some tasks that were made :
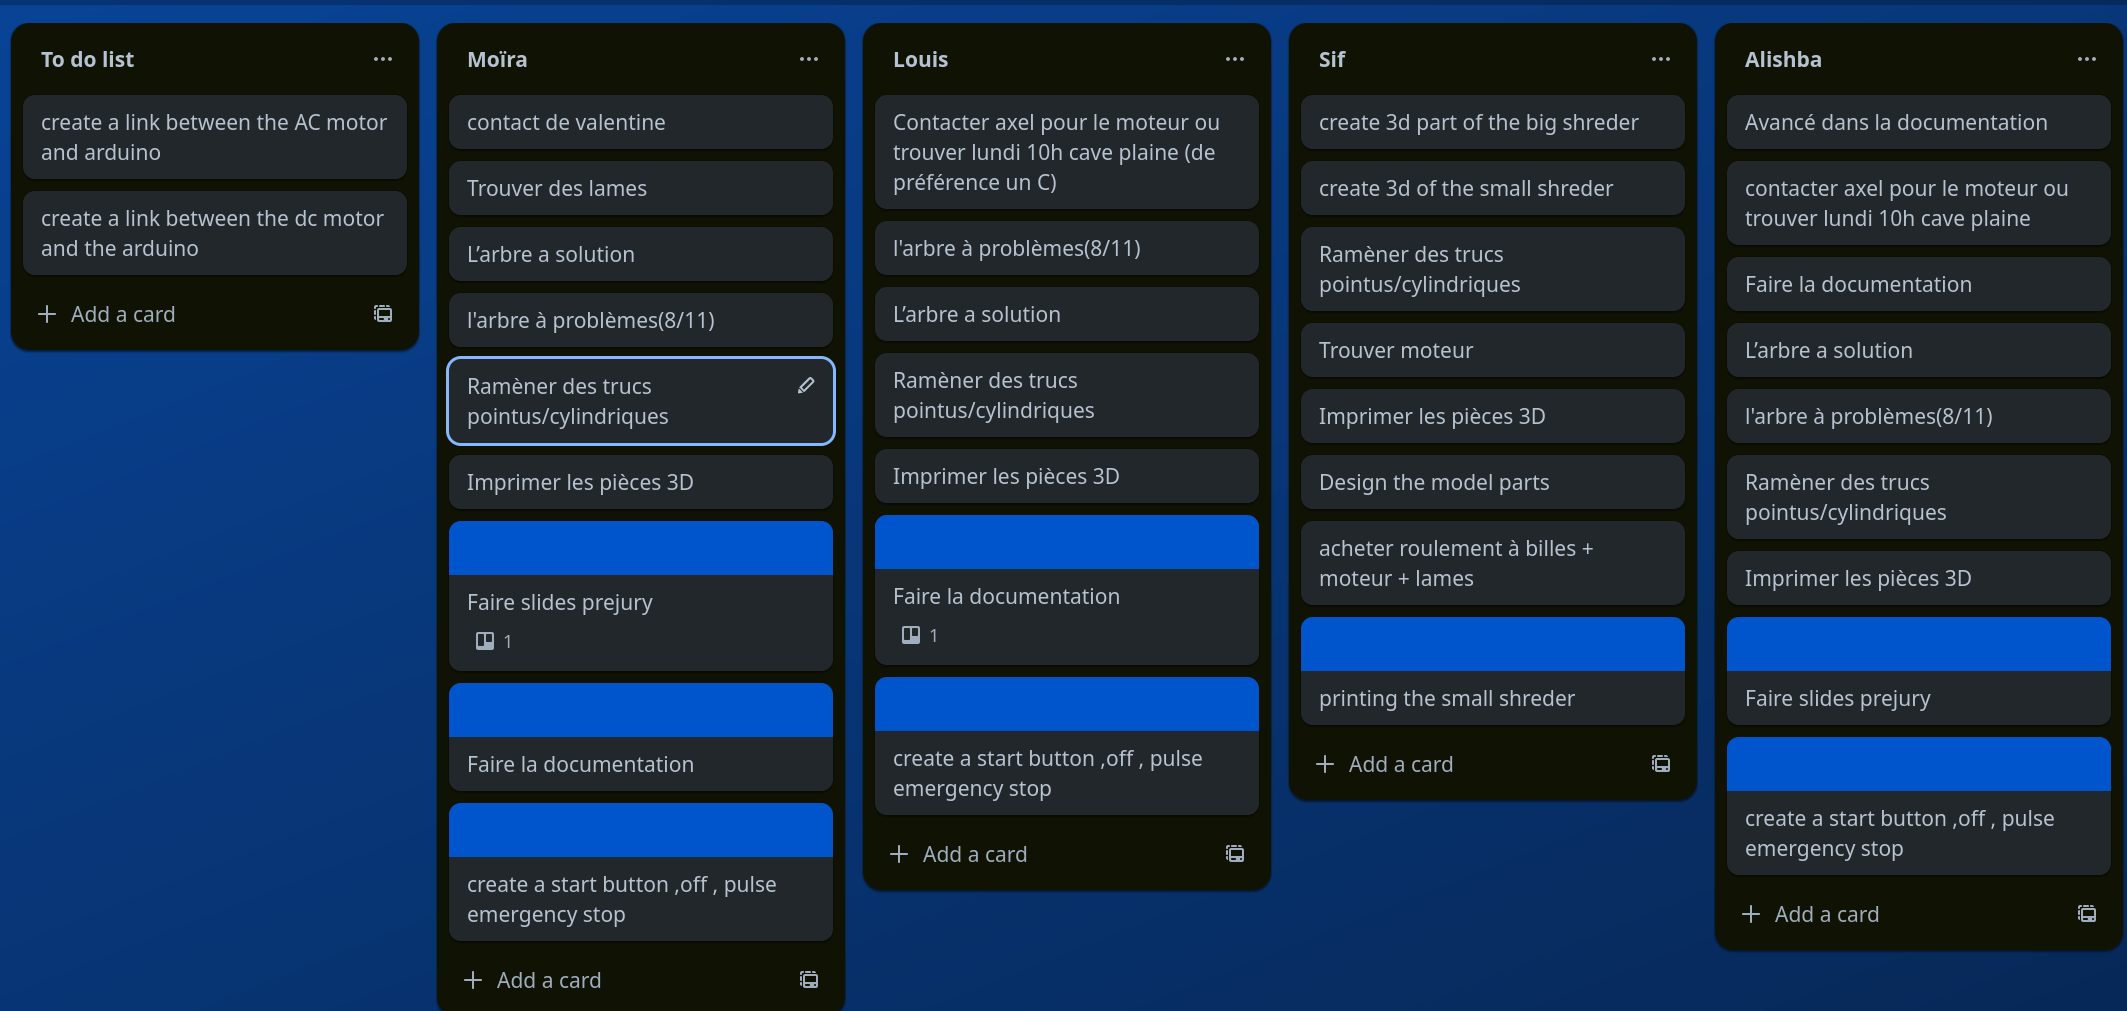
We have scheduled weekly meetings every Wednesday evening and during these meetings, we set tasks for the week, review project status, and discuss remaining work. This structured approach helps us stay organized and focused on achieving our project goals. This helped us to avoid last-minute rushes.
At times, we encountered differences in perspectives and ideas, which, surprisingly, turned out to be advantageous for our team. These occasional disagreements served as opportunities for constructive discussions, allowing us to explore various viewpoints and gain deeper insights into the project. The diversity of ideas led to a creative environment, encouraging us to consider alternative approaches and refine our strategies. Ultimately, these confrontations enriched our decision-making process and contributed to the overall success of the project.
We also faced occasional challenges in team dynamics, particularly when there were lapses in communication. It occasionally slowed down the project’s progress. We quickly fixed the communication problem by having regular meetings and using Trello. This helped us stay updated on everyone’s tasks and progress.
It was also challenging to coordinate our schedules since we are from different faculties and we have different class timings. However, we managed to find a day that worked for everyone to meet.
We experienced some idea confrontations; indeed, there were instances where not all group members agreed on the same idea. To address this, we opted to test out different approaches, allowing us to explore a variety of possibilities within the limited time available.
Thanks#
A special thanks to:
- GreenFabric, who helped us throughout the project
- Thomas Torbeyns & Mélanie Chillaud, from FabLab ULB, who helped us when we were stuck
- Denis Terwagne, from FabLab ULB, who gave us this amazing course